- What is a Salesforce Sandbox?
- Create a sandbox in Salesforce
- Salesforce Sandbox Refresh
- Salesforce Sandbox Availability and Costs
- Sandbox templates
- Salesforce Sandbox as a backup solution?
- Optimize Salesforce Data Protection
1. What is a Salesforce Sandbox?
1.1. Types of Salesforce Sandboxes
Developer Sandbox: This is intended for coding and testing by individual developers. It includes a copy of your org's configuration (metadata) but no production data.
Developer Pro Sandbox: This is similar to the Developer Sandbox, but with increased storage for larger development and testing tasks.
Partial Copy Sandbox: This sandbox includes your org's metadata and a sample of your production org's data (defined by a sandbox template). It's ideal for user acceptance testing, integration testing, and training.
Full Sandbox: As the name implies, it's a full replica of your production org, including all data and metadata. It is mostly used for performance testing, load testing, and staging.
2. Create a sandbox in Salesforce
2.1. How to create a Developer Sandbox using Salesforce
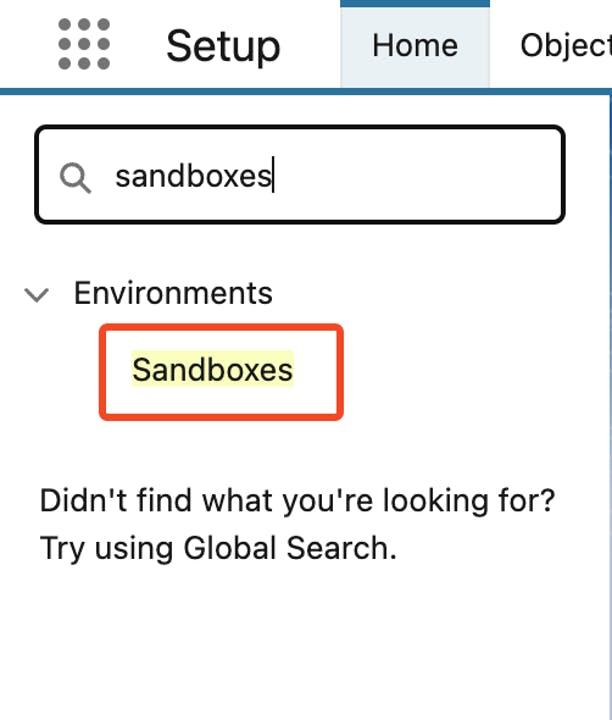
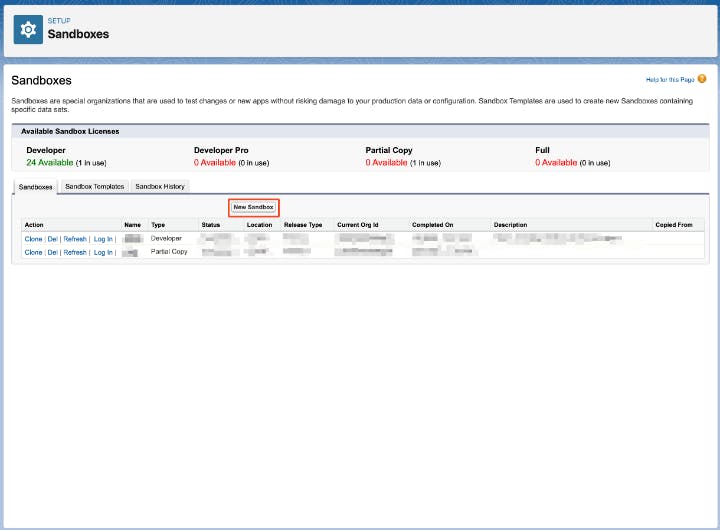
Step 1: Navigate to Setup > Sandboxes > New Sandbox.
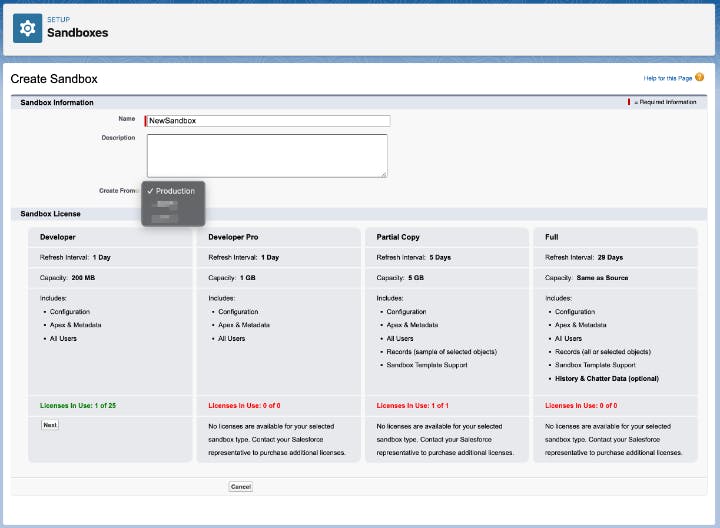
Step 2: Choose the Developer type, give it a name and description, and create a sandbox template to define the sample of data you want to include.
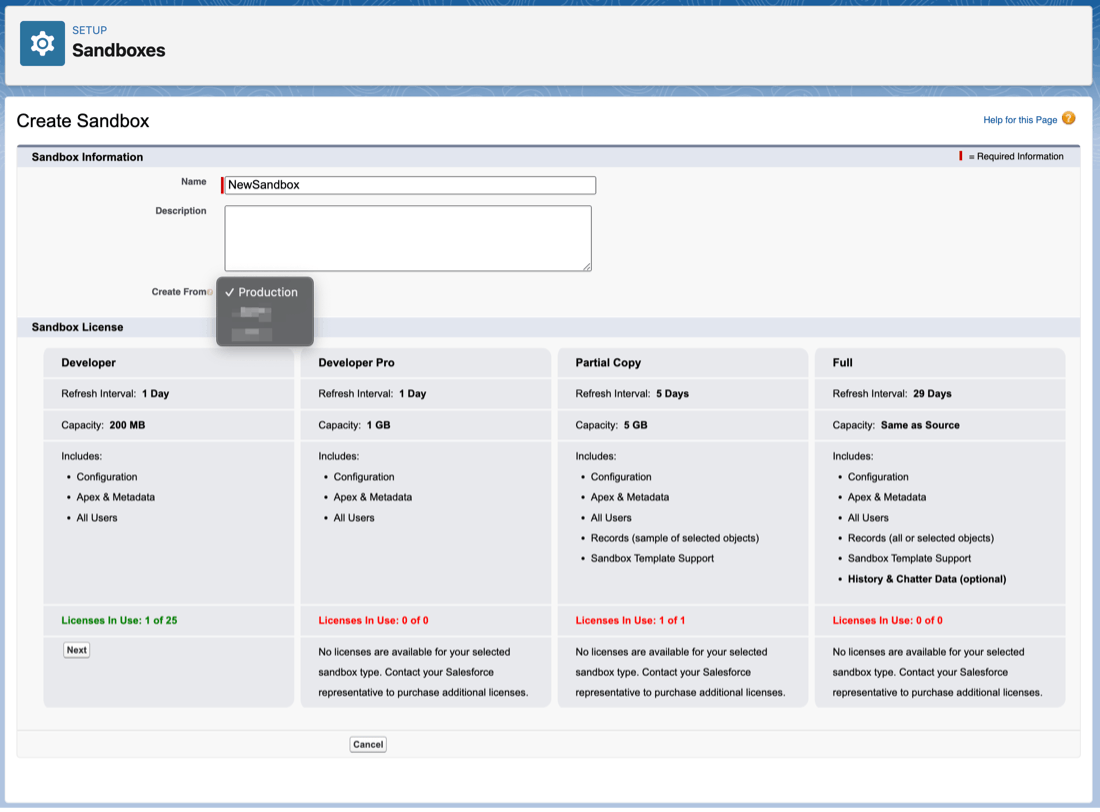
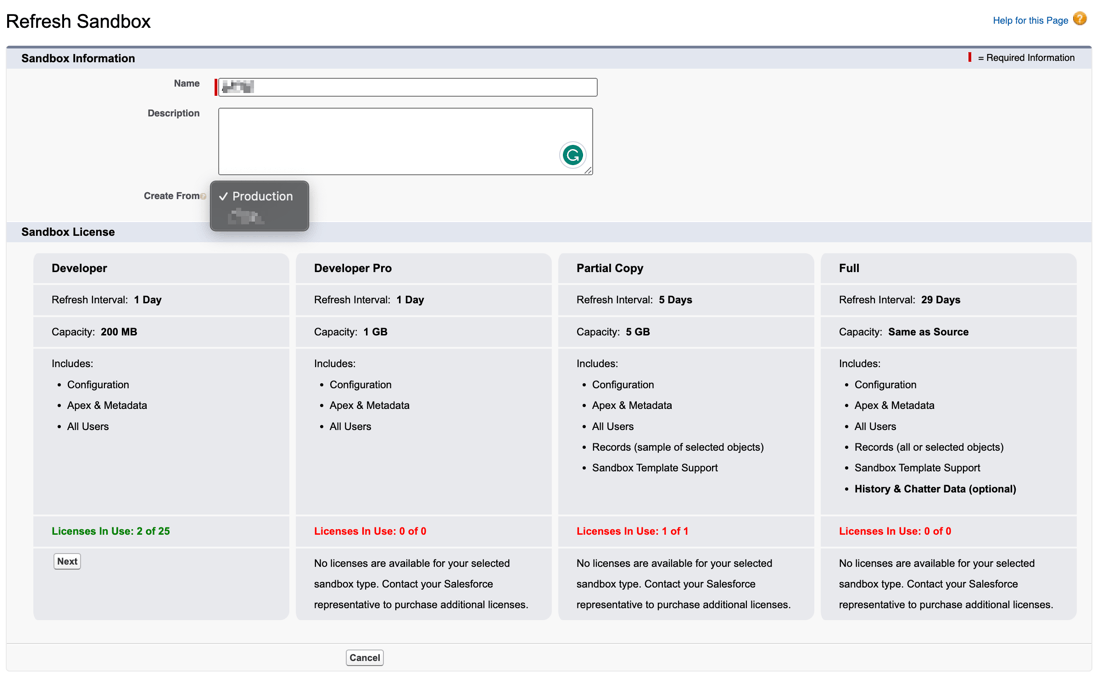
Step 3: Type in a name for the sandbox. You can either create from Production or an existing sandbox.
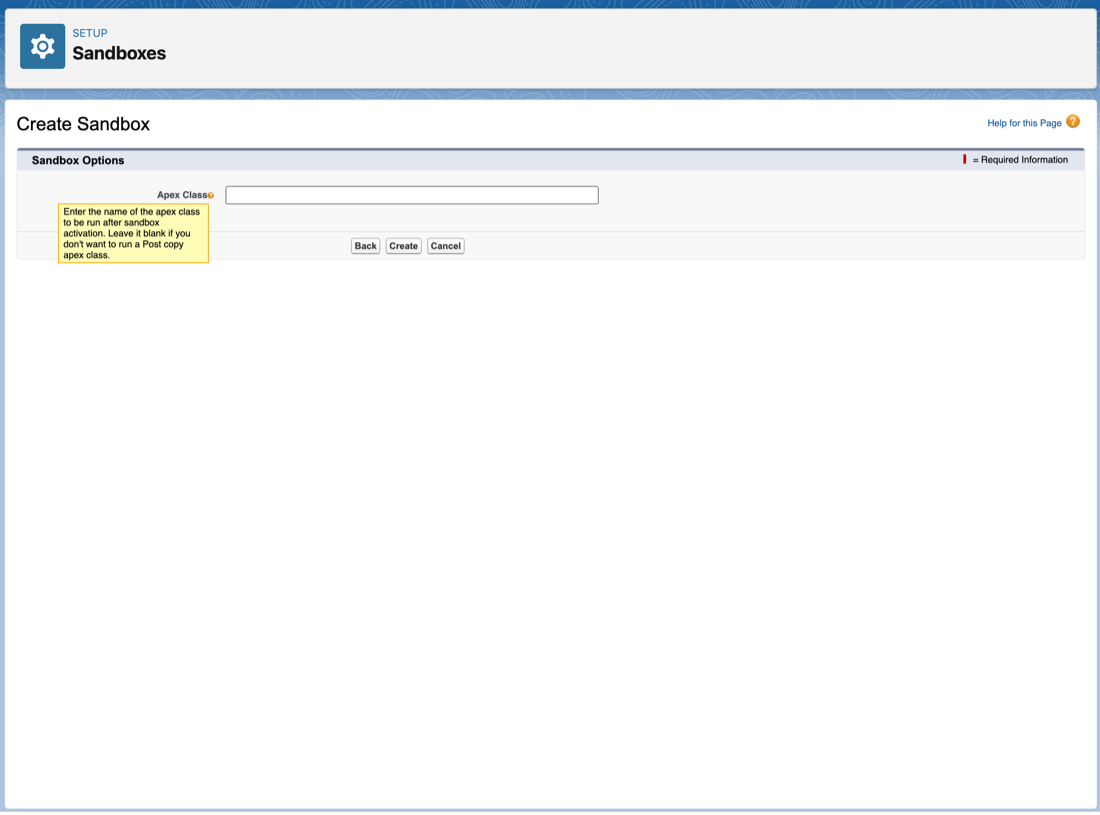
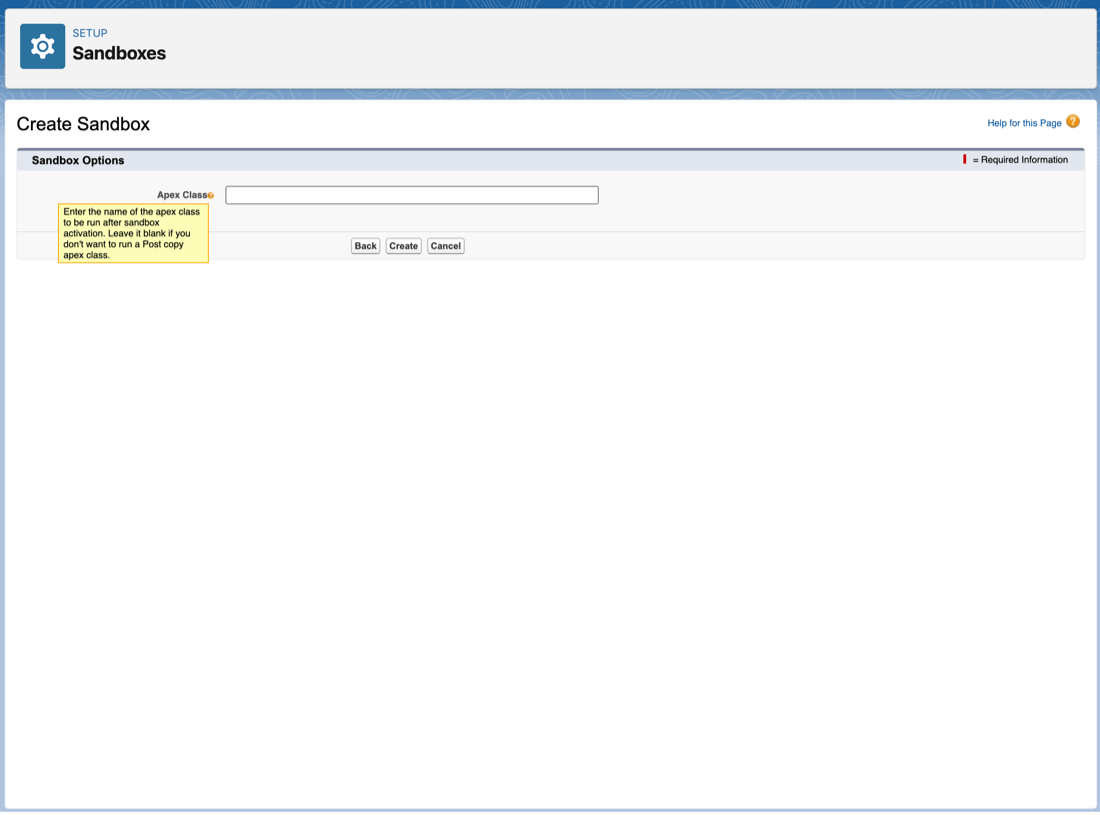
Step 4: If you have any pre-defined Apex class you want to run immediately after sandbox creation, type it here. Otherwise, leave it blank and click Create.
The sandbox creation will be queued. Once it has been completed, you will receive an email from Salesforce.
Step 5: Create a data export: Navigate to Setup > Data Export > Export Now or Schedule Export. Choose the objects you want to backup and initiate the export. Salesforce will prepare a .zip file with your data and send you an email when it's ready to download.
Step 6: Import the data to the sandbox: In the sandbox, navigate to Setup > Data Import Wizard. Use the wizard to upload the .zip file from the data export process. Monitor the data import for any errors or issues.
Note: Developer Sandboxes do not contain any data, only metadata. The process mentioned above will allow you to populate the sandbox with a subset of your production data.
2.1.1 How to create a Developer Pro Sandbox using Salesforce
2.2. How to create a Partial Copy Sandbox using Salesforce?
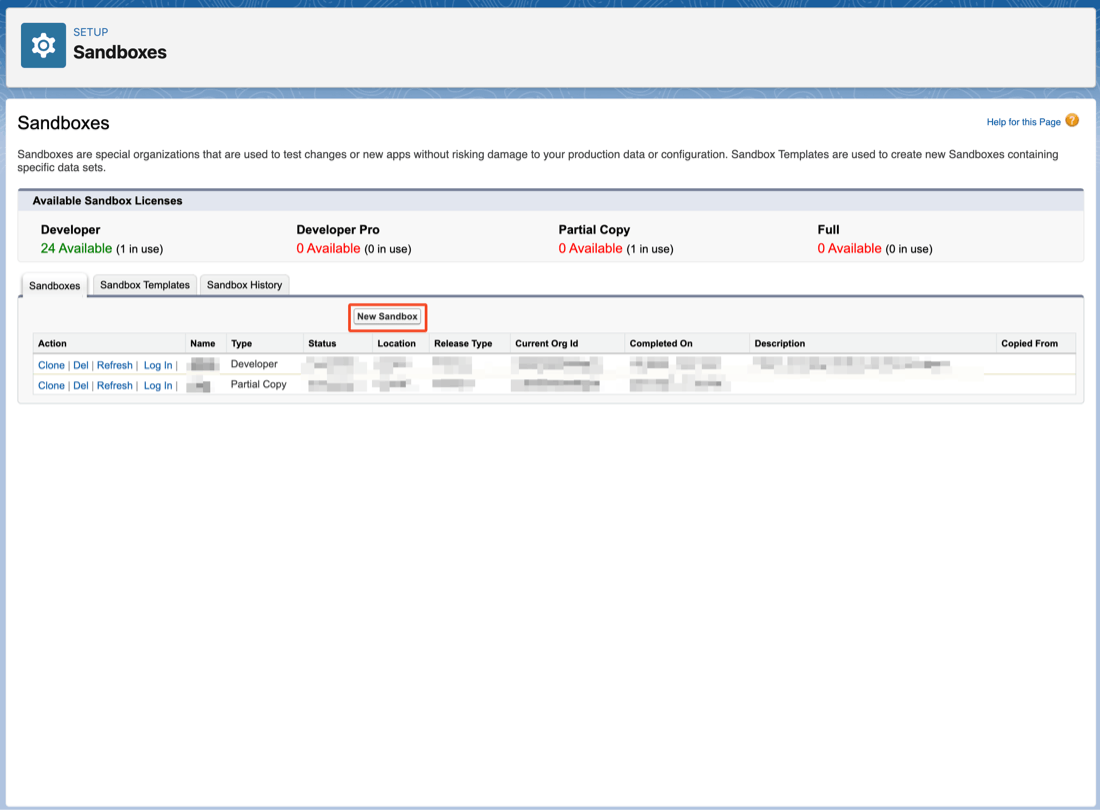
Step 1: Navigate to Setup > Sandboxes > New Sandbox.
Step 2: Choose the Partial Copy type, give it a name and description, and create a sandbox template to define the sample of data you want to include.
Step 3: Type in a name for the sandbox. You can either create from Production or an existing sandbox.
Step 4: If you have any pre-defined apex class you want to run immediately after sandbox creation, type it here. Otherwise, leave it blank and click Create.
The sandbox creation will be queued. Once it has been completed, you will receive an email from Salesforce.
Step 5: Check the sandbox: Once Salesforce has created the sandbox, you can log in and confirm that correct data has been included.
Note: Partial Copy Sandboxes include a sample of your production data defined by a sandbox template. You can choose different objects to include in the template depending on your backup needs.
2.3. How to create a Full Sandbox using Salesforce?
Step 1: Navigate to Setup > Sandboxes > New Sandbox. Choose the Full type, give it a name and description, and click Create.
Step 2: Check the Sandbox: Once Salesforce has created the sandbox, you can log in and confirm that all your production data has been included.
Note: Full Sandboxes are a complete copy of your production org and include all data and metadata.
3. Salesforce Sandbox Refresh
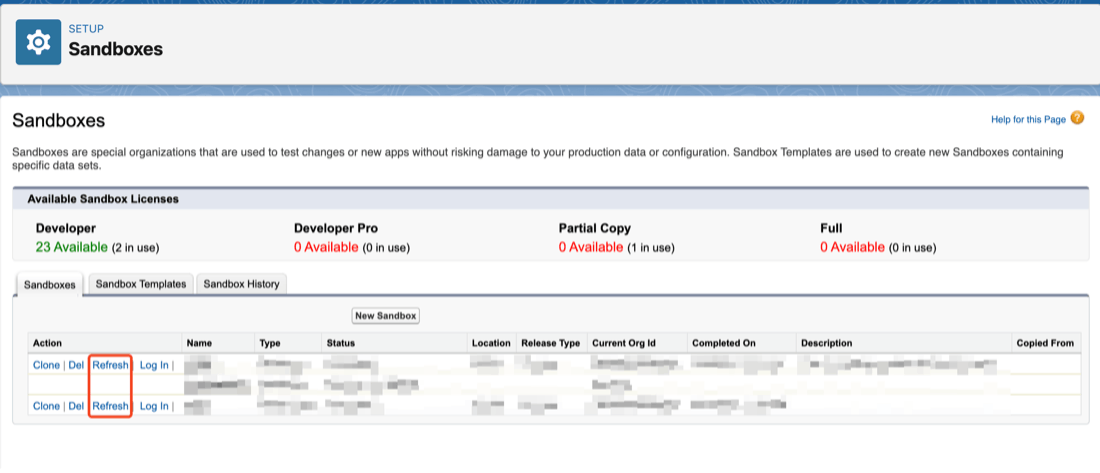
Step 1: Navigate to Setup > Sandboxes.
Step 2: On the Sandboxes page, you'll see a list of your existing sandboxes. Identify the sandbox you want to refresh. On the right of the sandbox you want to refresh, click on the Refresh link.
Step 3: In the dialog box that appears, choose the type of Sandbox (if available) and, if necessary, choose a Sandbox Template. Then, click Refresh.
Step 4: In the next screen, enable Auto Activate if you want the sandbox to be enabled automatically. If deselected, you will have to manually activate the sandbox from Salesforce mail.
3.1. Refresh Intervals and Considerations
Notes:
4. Salesforce Sandbox Availability and Costs
5. Sandbox templates
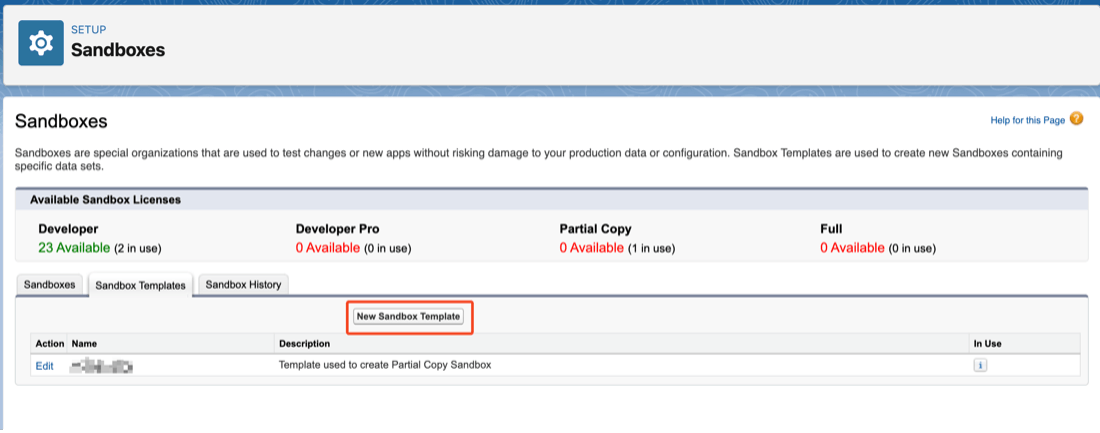
Step 1: Navigate to Setup > Sandboxes.
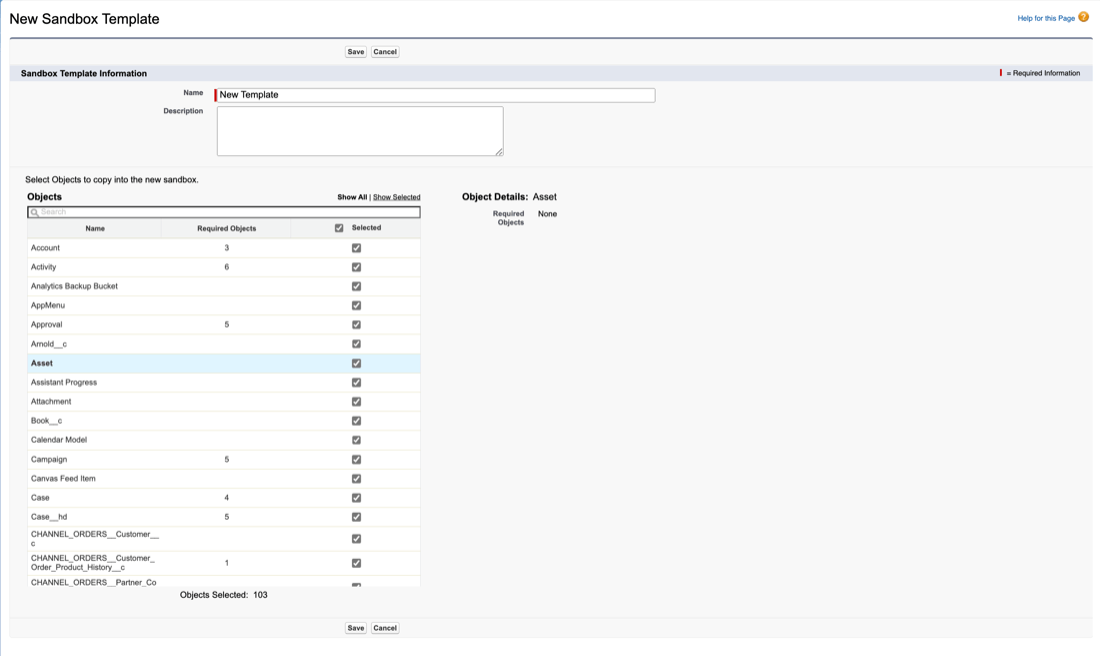
Step 2: Click on the Sandbox Templates >New Sandbox Template button.
Step 3: Fill in the template name and description fields.
Step 4: Choose which objects you want to include in your sandbox. You can include or exclude standard and custom objects. For each object, you can also specify whether to include all records, no records, or a defined subset of records.
Note: If you are excluding an object, Salesforce will notify you that the related objects will also be removed.
Note:
6. Salesforce Sandbox as a backup solution?
A Sandbox isn't a backup solution in itself. (See the limitations of Salesforce Sandbox as a backup solution) While it can contain a replica of your data, it's primarily designed for testing and development. But it plays a crucial role in backup and recovery strategy. By testing your recovery process in a sandbox, you ensure that you can restore data accurately and efficiently when required.
7. Optimize Your Salesforce Data Protection with SysCloud
That's where SysCloud steps in. SysCloud provides comprehensive backup and granular restore capabilities fro Salesforce data at a fraction of the cost of additional Salesforce Sandboxes. Starting at just $3/user/month with no minimum billing, SysCloud offers an affordable and reliable backup solution for your Salesforce data and metadata. You don't need to worry about purchasing additional API calls; SysCloud is designed to work seamlessly with your existing Salesforce setup.