- What Is OneDrive shared folder?
- How can I create a shared folder in OneDrive?
- How can I add a shared folder in OneDrive?
- How can I sync OneDrive shared folders to my local computer?
- Why should I backup my OneDrive data?
- How can I backup my OneDrive data?
- Frequently asked questions
Article at a glance
Read more
What Is OneDrive shared folder?
For more information on OneDrive for Business, click here.
How can I create a shared folder in OneDrive?
Step 1: Click on the File Explorer icon on your system.
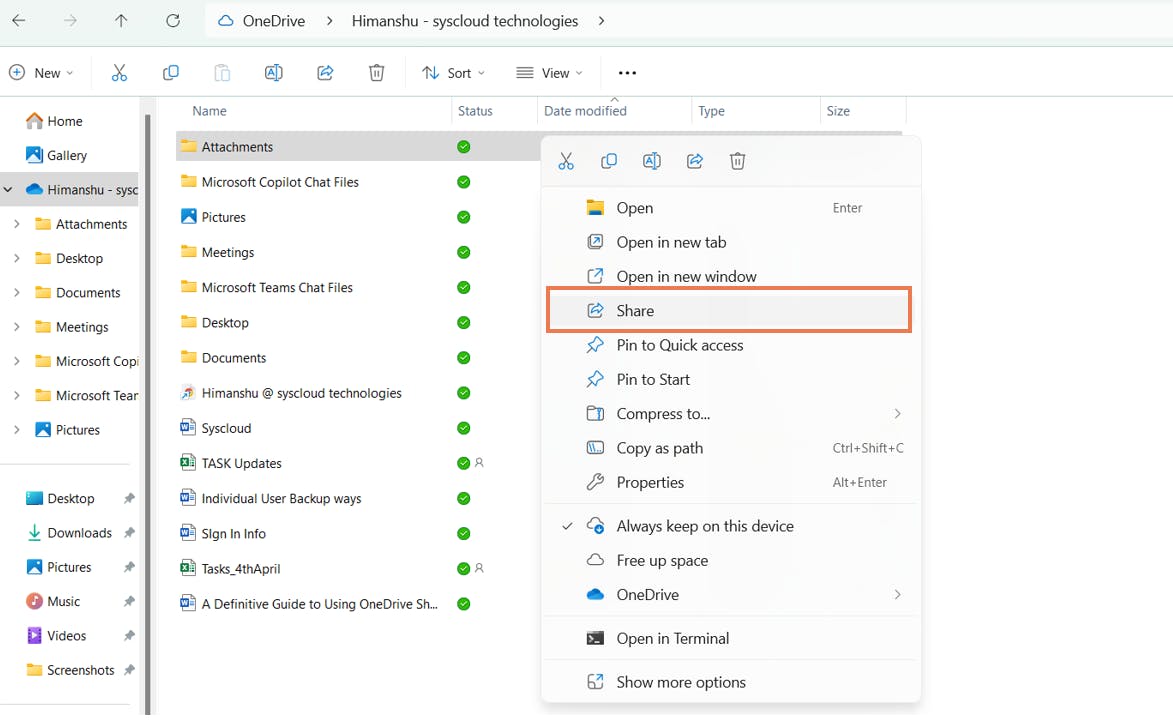
Step 2: Right-click on the folder you want to share and select the “Give access to” option.
Step 3: Select the “Specific people…” option.
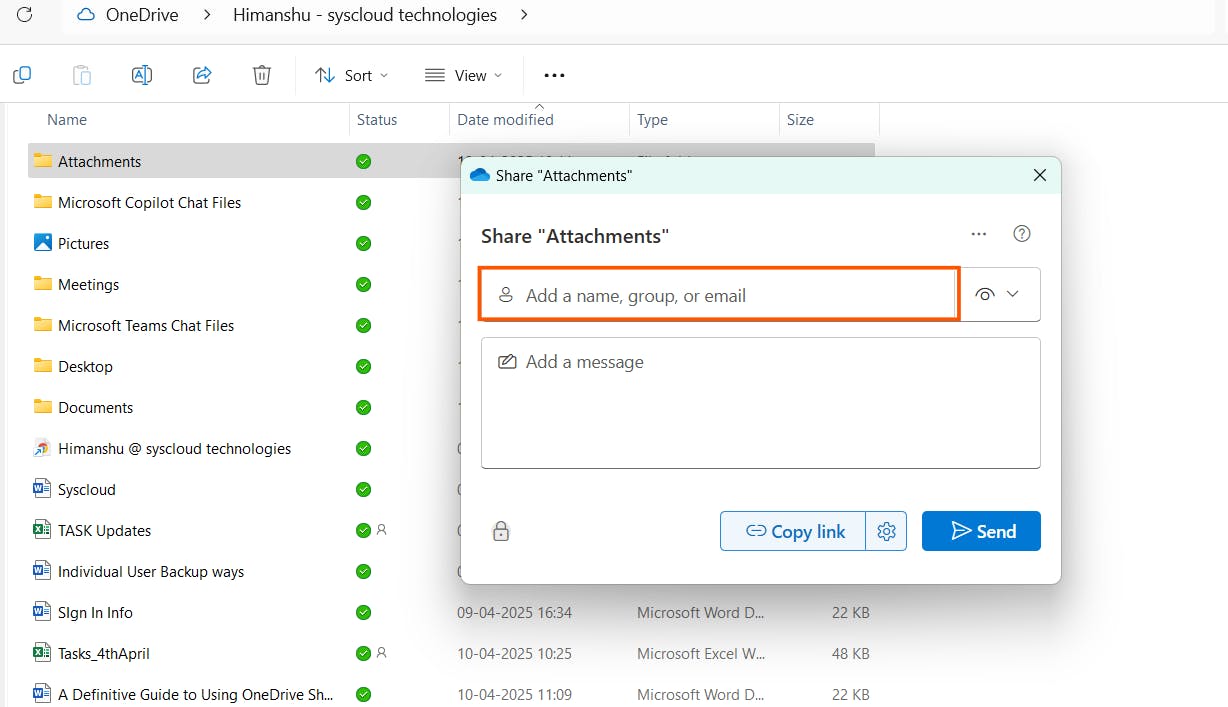
Step 4: Click on the drop-down menu and select the user you want to share the file with.
Step 5: Click on the “Add” option to add the user.
Step 6: By default, the added user is given access to read the OneDrive shared folder or file. You can give them edit access or remove their access completely by selecting the option as given below.
Step 7: Click on “Share” button to share the file or folder with the recipient.
How can I add a shared folder in OneDrive?
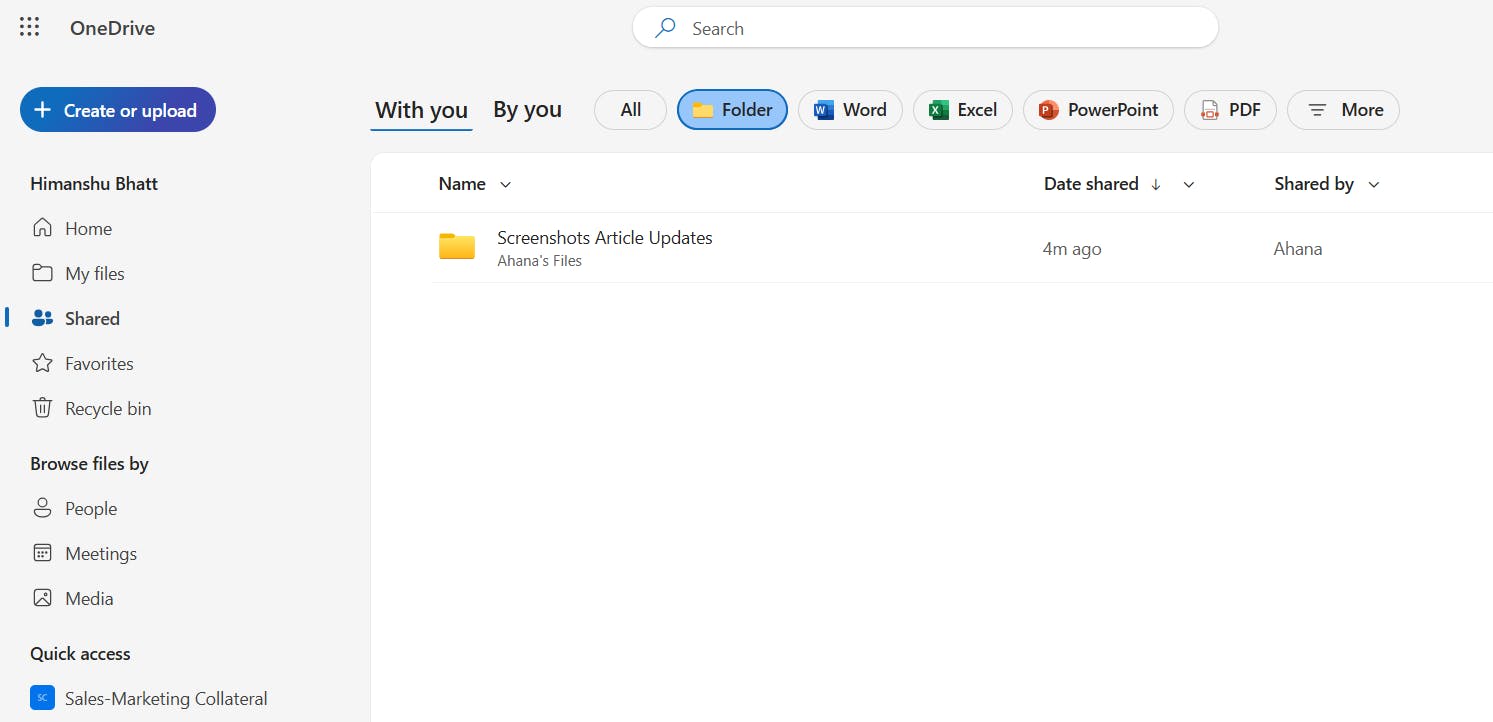
Note: Shared folders added to your OneDrive do not use any of your OneDrive storage space. They only count against the folder owner’s storage space.
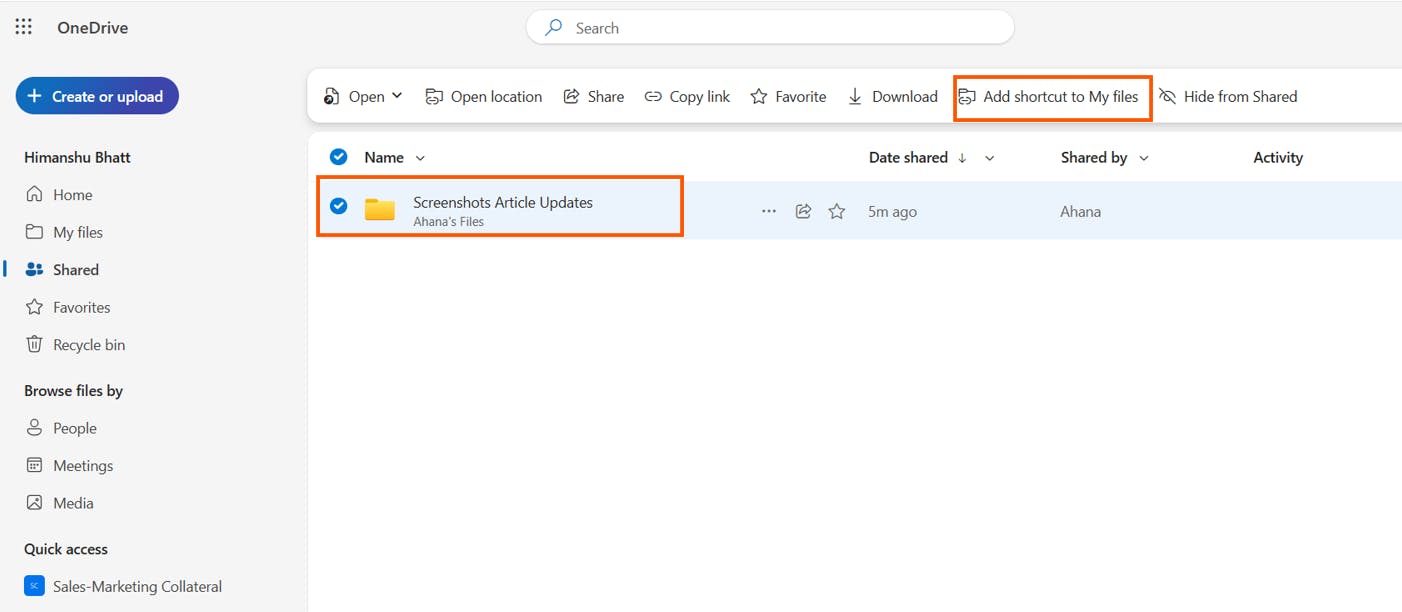
Step 1: Login to your Microsoft 365 account and click on ‘OneDrive’.
Step 2: Click on ‘Shared’.
Step 3: Locate the folder that you want to add and click on ‘Add shortcut to OneDrive’.
Note:
How can I find a shared folder in OneDrive?
Step 1: Log in to your Office 365 account.
Step 2: Click on ‘OneDrive.
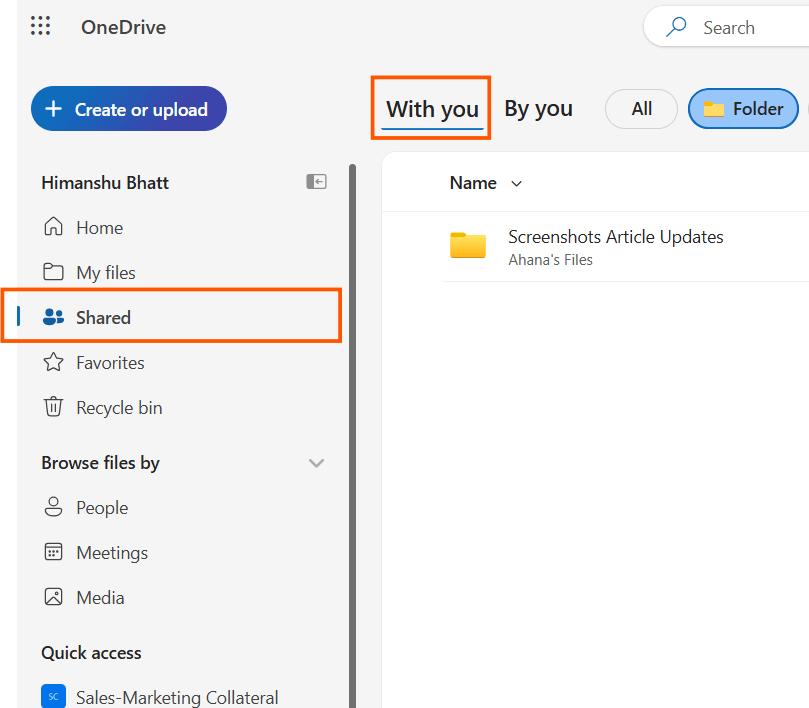
Step 3: In the navigation panel, click on ‘Shared’ > ‘Shared with you’ to view files that are shared with you.
Step 4: You can use either the ‘Sort’ option or filter option to easily find the file that is shared with you.
Note: Any items shared with you for which the permission was set to ‘Anyone’ with the link can view and edit won’t appear in your ‘Shared with me’ view, even if the person entered your email address when they shared the item.
Can I move files and folders in OneDrive?
How can I remove a file from the shared folder?
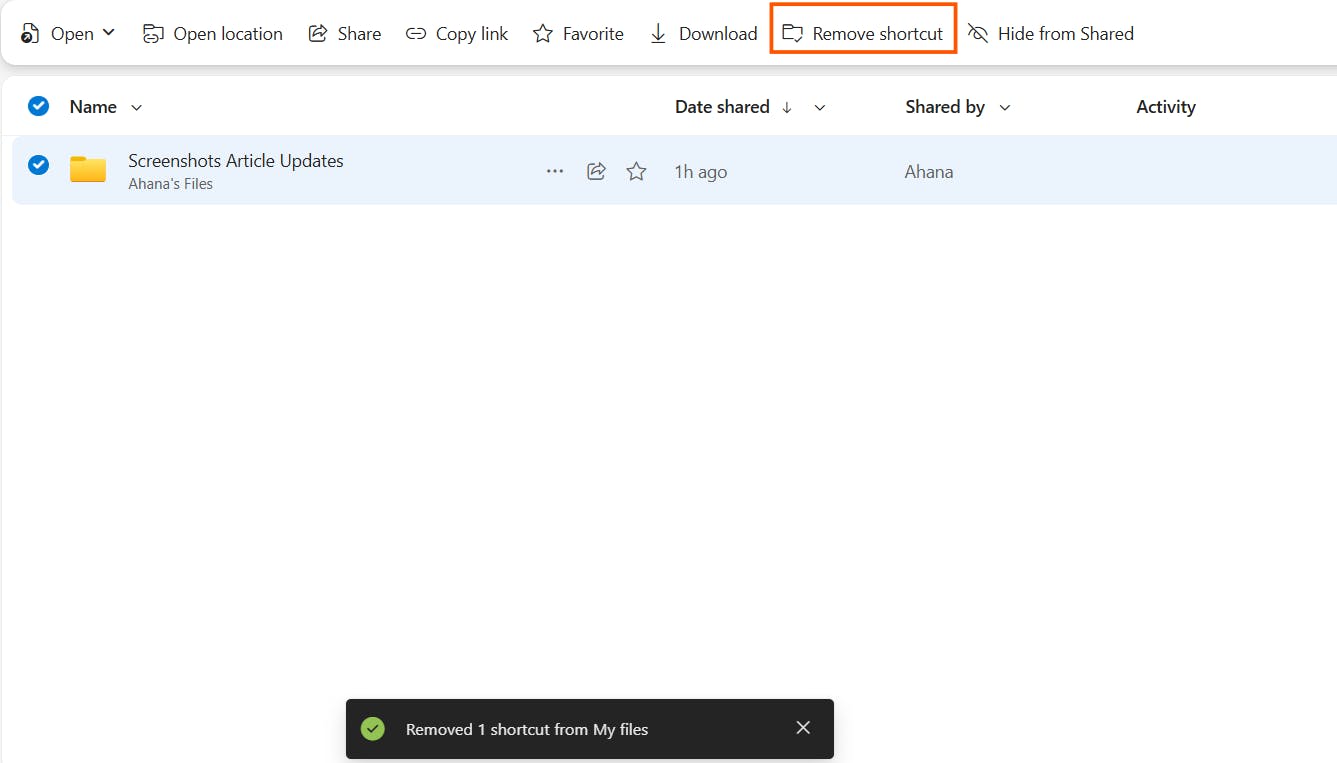
Note: Removing an item from your shared list doesn’t take away your permissions from the item. You can always access the file again using its link.
Step 1: Log in to your Office 365 account.
Step 2: Click on ‘OneDrive’ > ‘Shared’.
Step 3: Select the file that you want to remove.
Step 4: Click on ‘Remove from shared list’.
How can I sync OneDrive shared folders to my local computer?
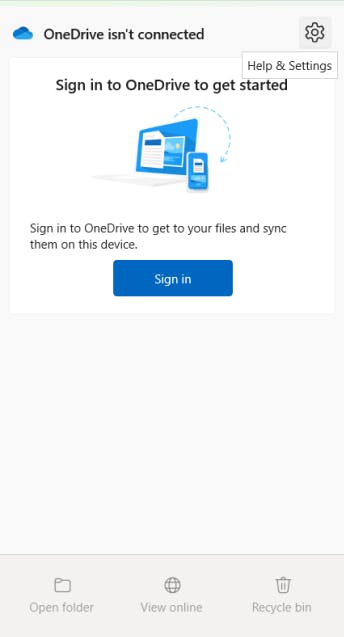
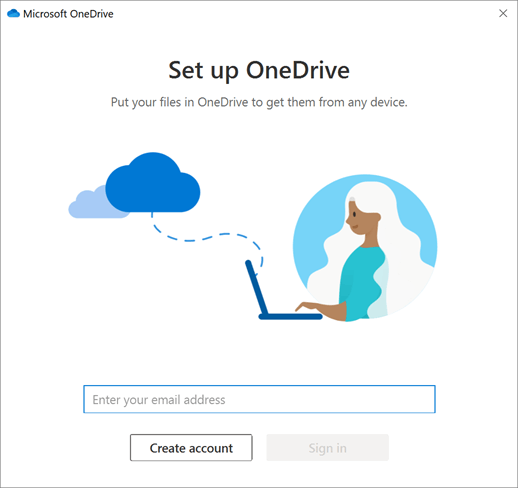
Step 1: Click on the Cloud icon on your desktop.
Step 2: Click on the “Sign in” button.
Step 3: Enter your login credentials in the dialog box and click on the “Sign in” button.
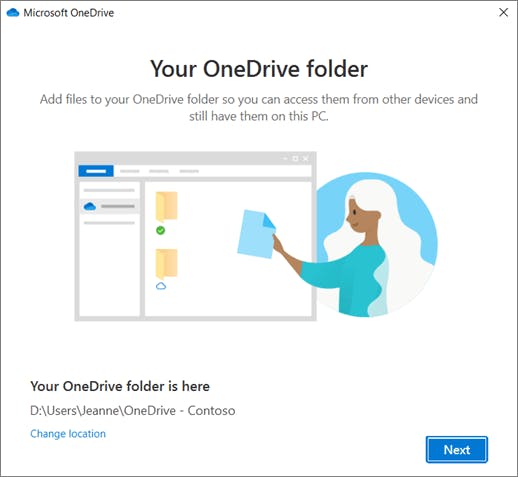
Step 4: After entering the credentials, click on the “Next” button.
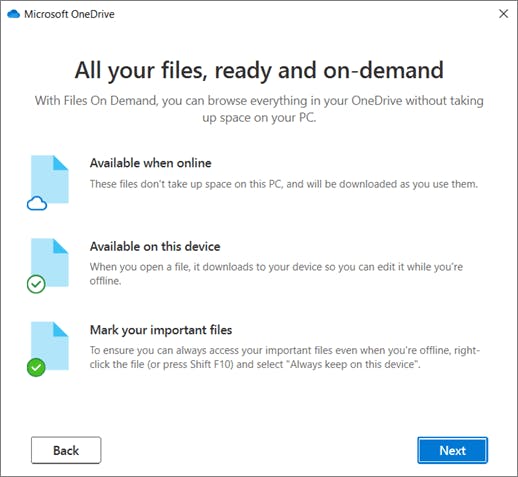
Step 5: Click on the arrow at the bottom right-hand corner of the window till you finish the launch.
Step 6: Click on the “Open my OneDrive folder” button
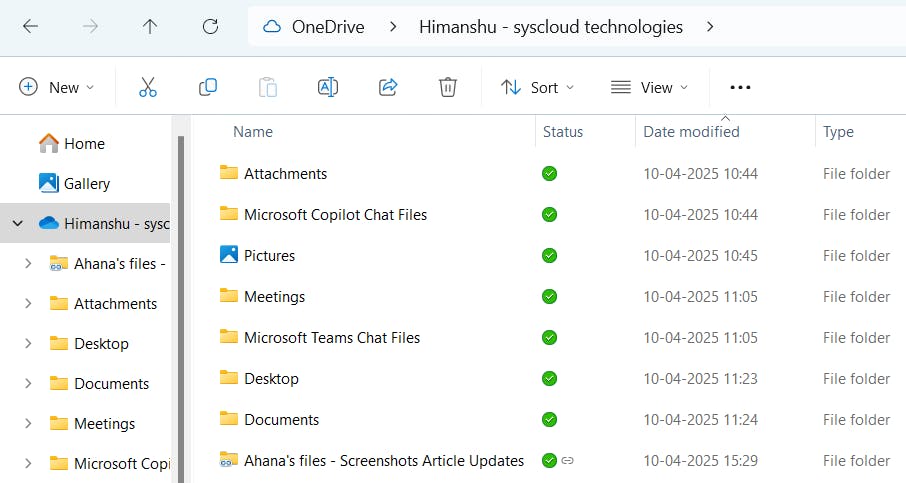
Step 7: You will find all your files to be synced with the local system
How can I share Onedrive files and folders?
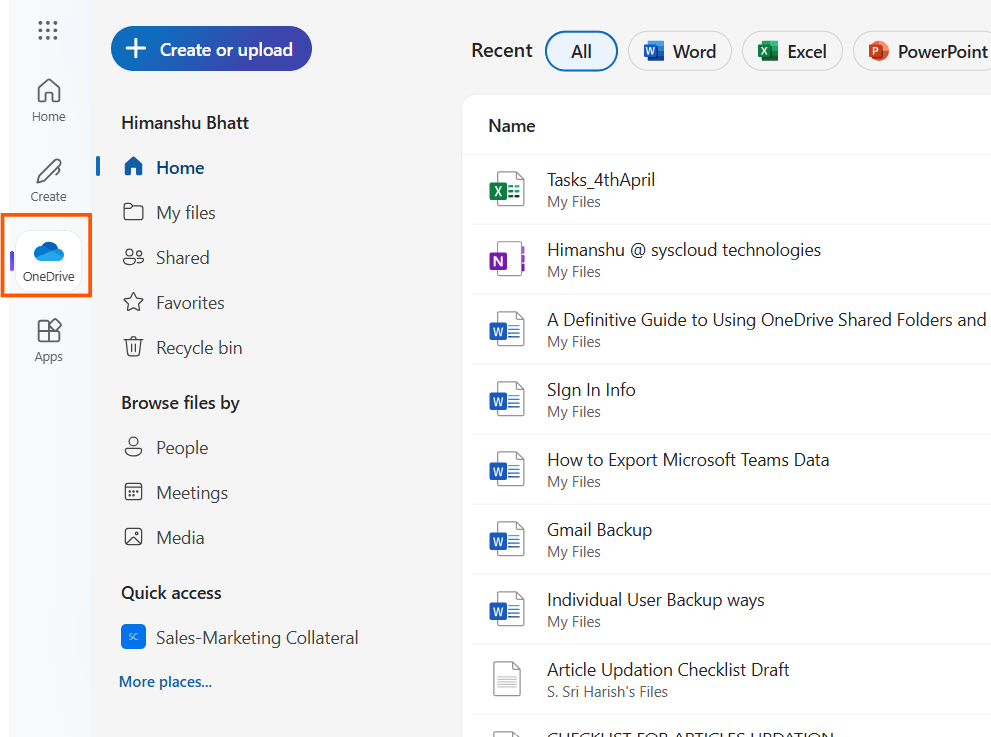
Step 1: Log in to your Office 365 account using your credentials.
Step 2: Once you log in, click on the “OneDrive” application under the Apps section
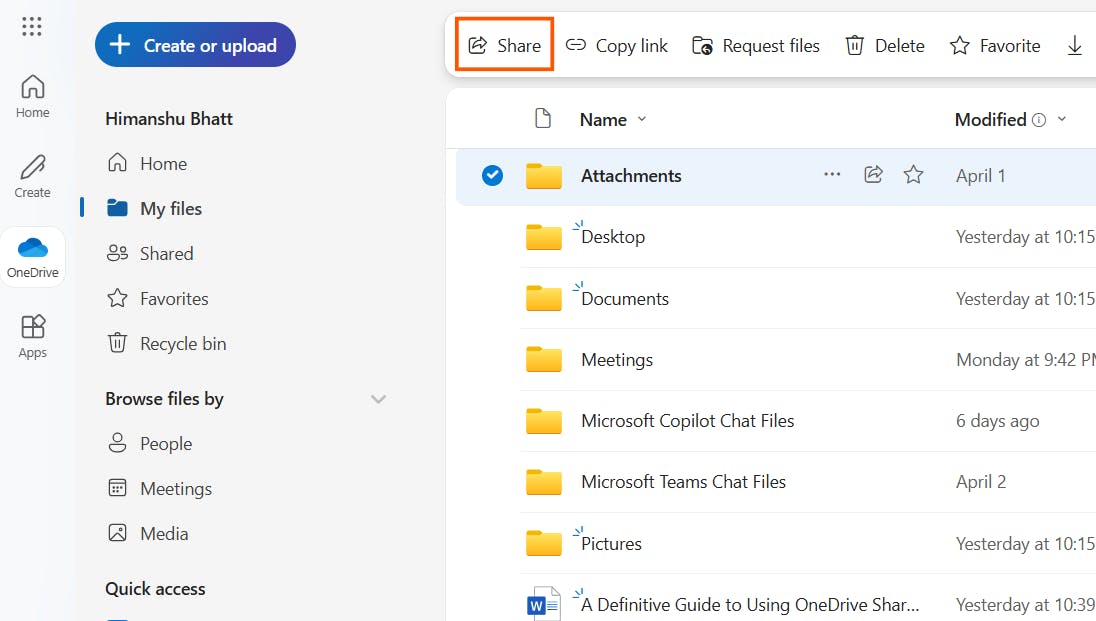
Step 3: You will see a list of files and folders in your OneDrive. Select the required file or folder that you want to share and click on on the “share” icon at the top left-hand side of the window.
Note: You can only share one file or folder at a time. If you want to share multiple files or folders, you have to repeat this step as many times as required.
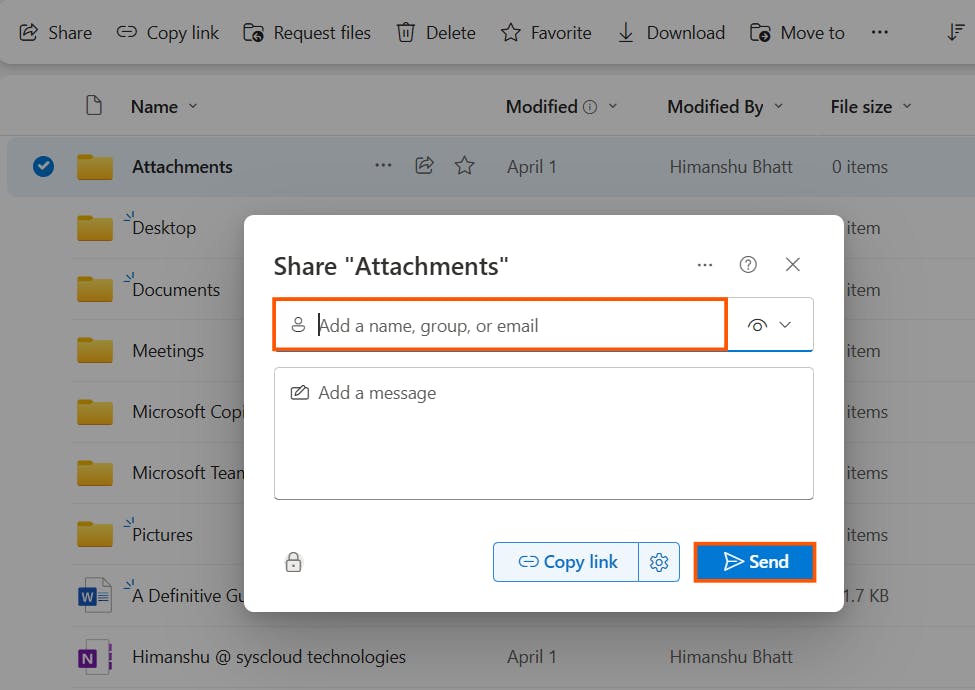
Step 4: Enter the email address of the recipient and click on the “Send” button.
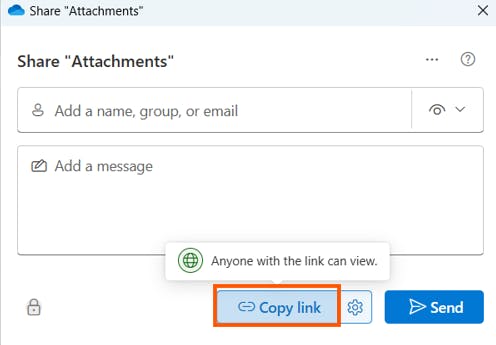
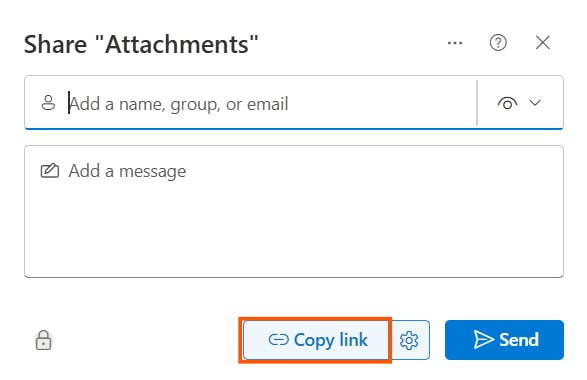
Step 5: Alternatively, you can also use the link to the file or folder in OneDrive to share it. Click on the ellipsis option next to the file or folder name and select the “Copy link” option.
Step 6: You will get a shareable link to the OneDrive file or folder. Click on the “Copy” option to share it.
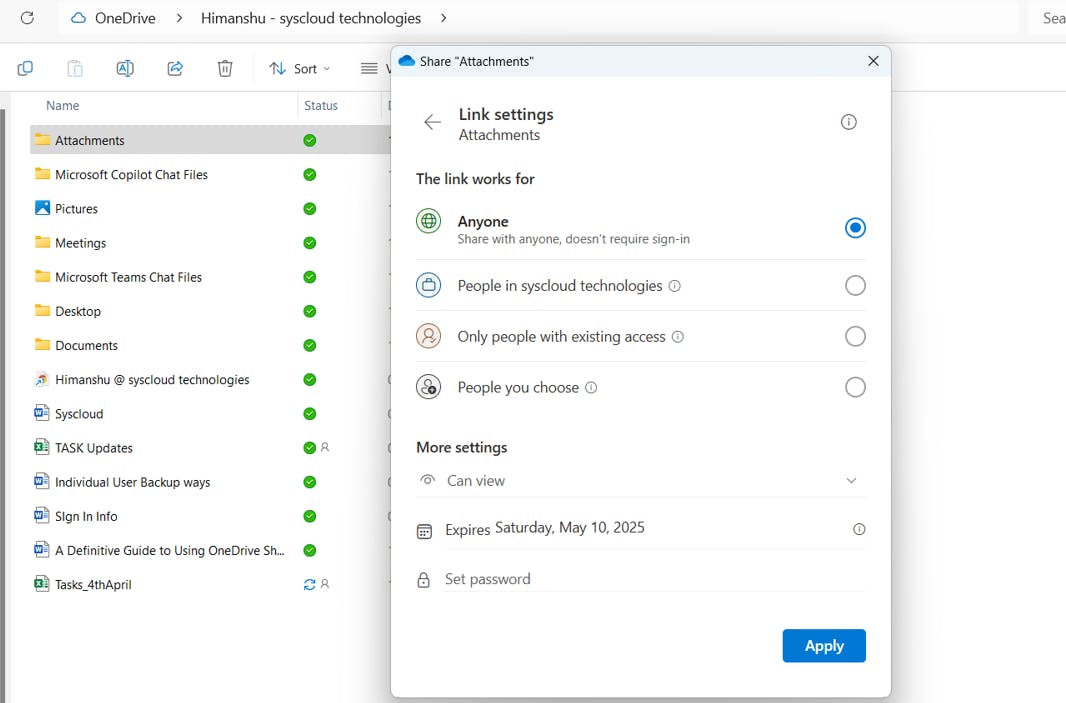
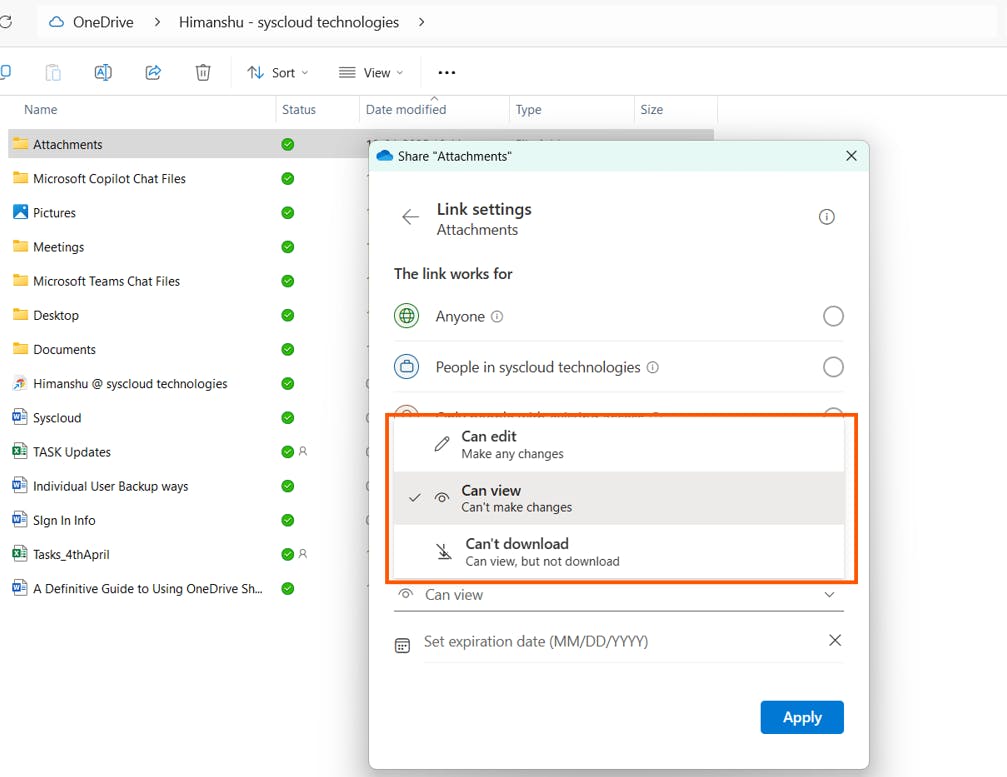
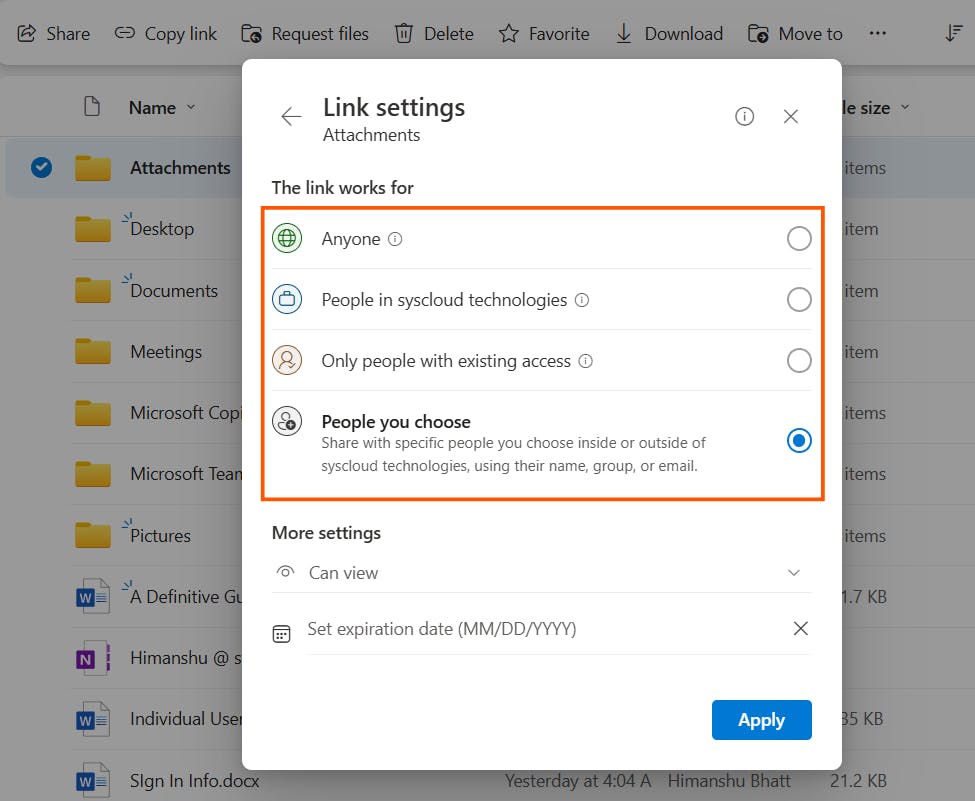
Step 7: You can also limit the access when you share. Click on the tab as shown below.
Step 8: From this list, you can select who can access the OneDrive shared folder or file with its link. You can also choose whether you want to give permission to edit the content, by checking or unchecking the “Allow editing” option.
Step 9: Click on the “Apply” button to confirm the changes.
How can I unshare a document in Onedrive?
Step 1: Open OneDrive application.
Step 2: Click on the “Shared” option in the left pane of the OneDrive application.
Step 3: Go to the “Shared by you” section.
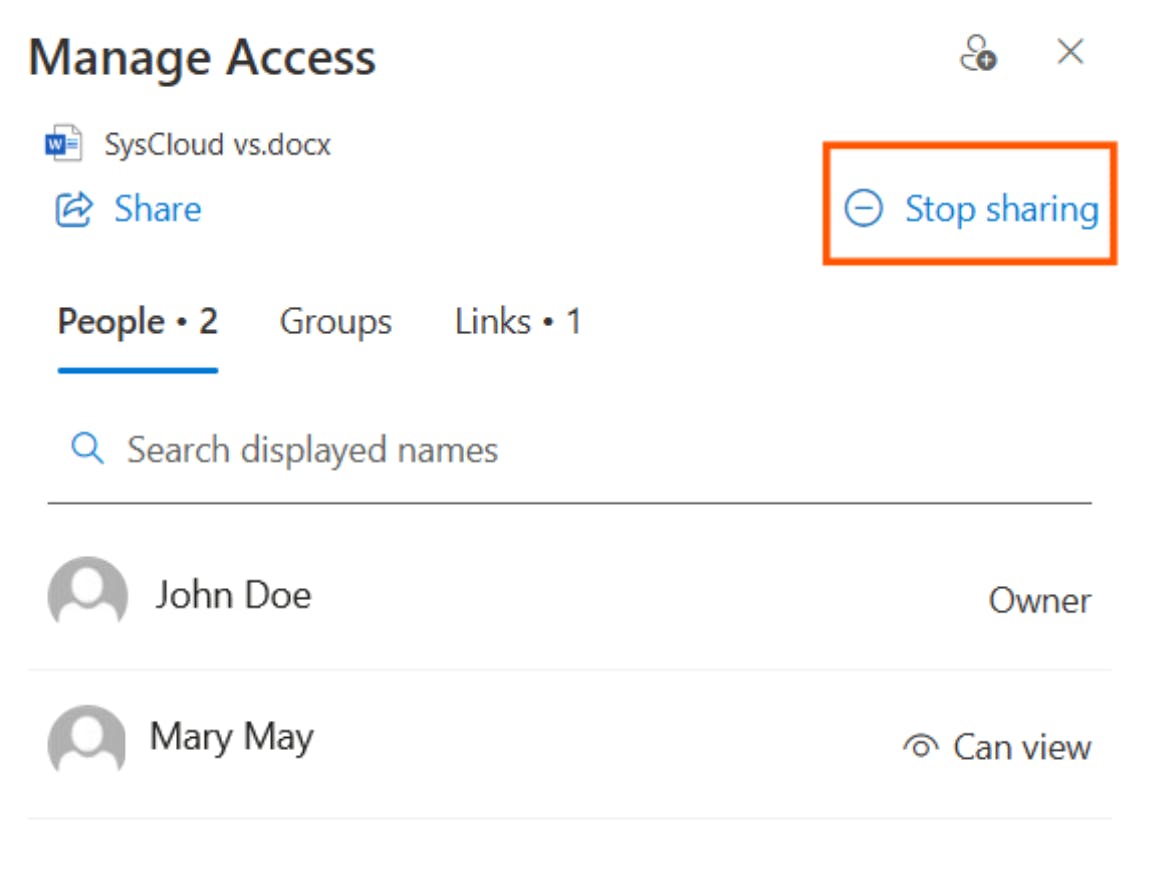
Step 4: Select the shared file or folder and click on the “Manage Access” option.
Step 5: To stop sharing the file entirely, click “Stop sharing”.
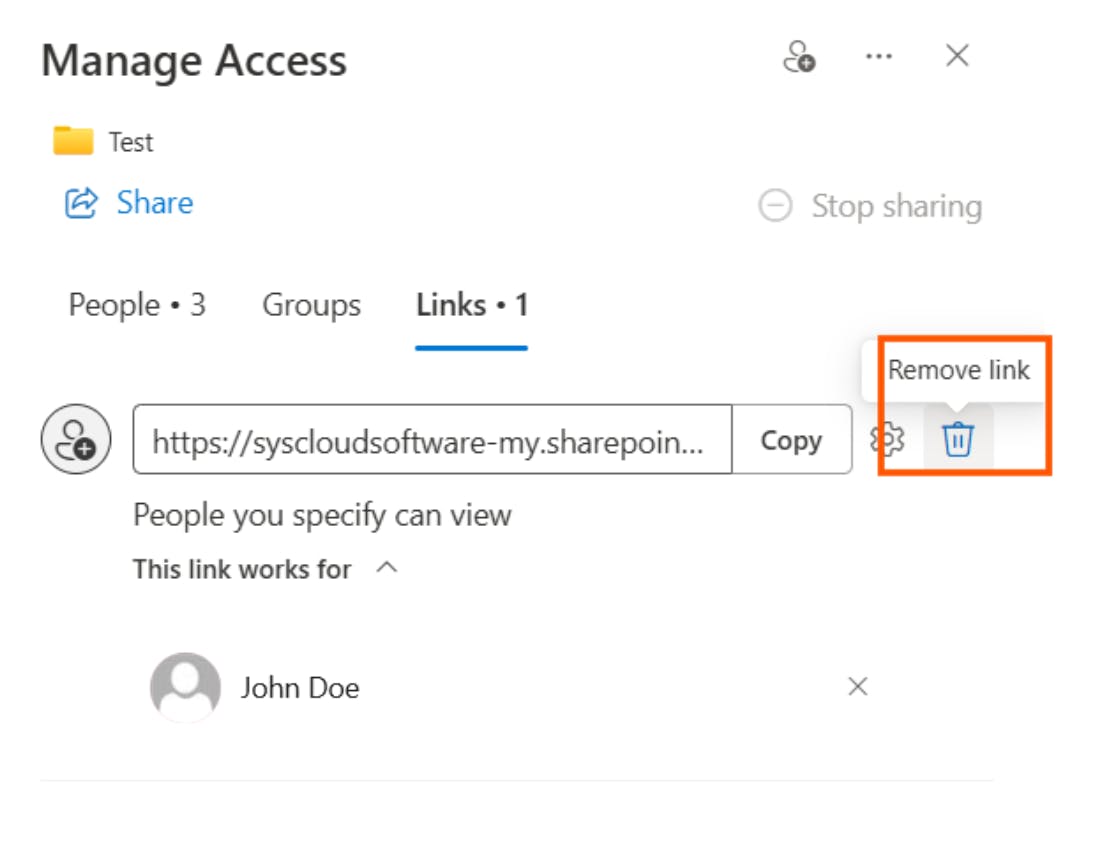
Step 6: To stop sharing with specific people, expand the list under a specific people link and click the “X” to remove someone.
Step 1: Login to your Microsoft 365 account.
Step 2: Click on OneDrive
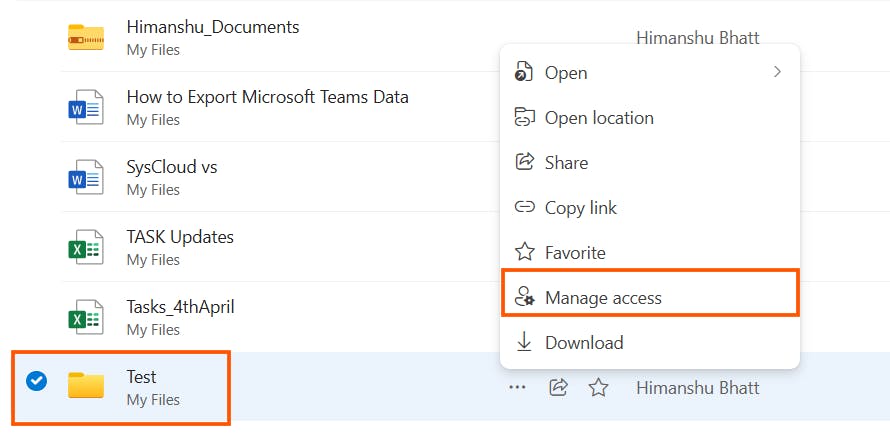
Step 3: Click on the three dots next to the file that you want to share. Select the option, ‘Manage access’.
Step 4: Click on the ‘+’ icon next to the Direct access section.
Step 5: Enter the name or email id of the user(s) with whom you want to share the file.
Step 6: You can also decide on the level of access that you want to give to these users.
Step 7: Once done, click on ‘Grant access’.
Why should I backup my OneDrive data?
How can I backup my OneDrive data?
For a detailed guide on creating a OneDrive backup, check out this post.
Frequently asked questions on OneDrive
1. What to do if my OneDrive files are not syncing?
Step 1: Check if the auto-sync feature is enabled on your system.
Step 2: Click on the OneDrive cloud icon on your desktop and see if your account’s OneDrive is up to date.
Step 3: Check if syncing has been paused on your system – this will be indicated by a pause sign on your OneDrive cloud icon. Tap or click on the pause notification to resume syncing.
Step 4: Check if your internet connection is working properly.
Step 5: Check if the application has any new update in your system’s action center.
Step 6: Try to sync the files and folders from the online drive by clicking on the “Sync” option.
2. Are OneDrive files stored locally?
3. How do I remove/uninstall OneDrive for Business?
Step 1: Press Windows + R to open the run command.
Step 2: Click on “uninstall a program” or “add/remove programs” option under the “Programs” section.
Step 3: Right-click on “Microsoft OneDrive” and select the “Uninstall” option.
4. Can anyone see my OneDrive files?
- No, all the files and folders created by you are initially private, until and unless you choose to share them.
- You can share the file or folder by selecting it and clicking on the “Share” option.
Note: In OneDrive for Business accounts, the IT admin can still access and view all your files and folders (including shared folders and files), as long as you use the business account for creation and storage.
5. How do I upload files to OneDrive?
Step 1: Open the OneDrive application.
Step 2: Click on the “Upload” icon.
Step 3: Select the “File” option to upload a specific file.
Step 4: Choose the “Folder” option to upload a full folder completely into the OneDrive application.
6. How to restore deleted files and folders on OneDrive?
- Open OneDrive application.
- Click on the “Recycle bin” option in the left pane of the OneDrive application.
- Select the deleted file or folder.
- Right click on the deleted item and click on the “Restore” option.
- If you are unable to find the deleted file or folder you were looking for, click on the “Second-stage recycle bin” link at the bottom of the page.
- Right click on the deleted item and click on the “Restore” option.
But, if the deleted file or folder is not present in the second-stage recycle bin, then you cannot restore it ever! This is why a backup solution is essential for every organization with critical business data.