- How to Transfer Google Drive to Another Account?
- Download and Upload
- Sharing
- Using Google Takeout
- From the Google Admin Console
- Using SysCloud
How to transfer Google Drive to another account?
- Download and upload
- Sharing
- Using Google Takeout
- From the Google Admin Console
- Using a third-party cloud backup tool like SysCloud
1. Download and upload
The Download and Upload method lets you transfer your Google Drive files to another account outside your domain.
How to transfer Google Drive to another account using download and upload method
Step 1: Log in to the account from which you want to transfer the files.
Step 2: Locate the file/folder that you want to transfer.
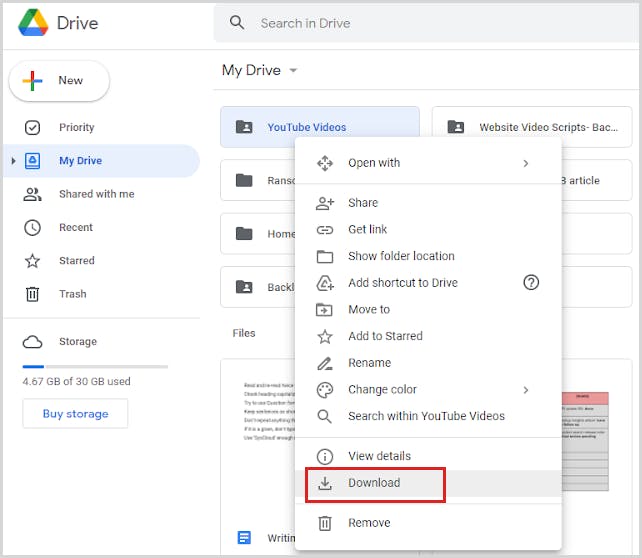
Step 3:Right-click on the file/folder and click on the option ‘Download'’
Step 4: Log in to the account into which you want to transfer the downloaded file.
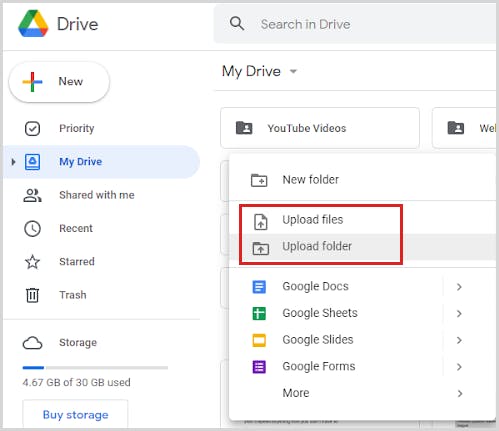
Step 5: Navigate to “My Drive” and click the “Upload files” or “Upload folder” option depending on what you have downloaded.
Step 6: Upload the downloaded file/folder to this user account accordingly.
Note: Depending on the size of the files/folders, the time taken to download will vary.
2. Sharing
You can share files or use the method when you want to transfer only a small batch of files to an account within your domain. Download and Upload>
How to transfer Google Drive to another account using sharing feature
Step 1: Log in to the account from which you want to transfer the files.
Step 2: Locate the file/folder that you want to transfer.
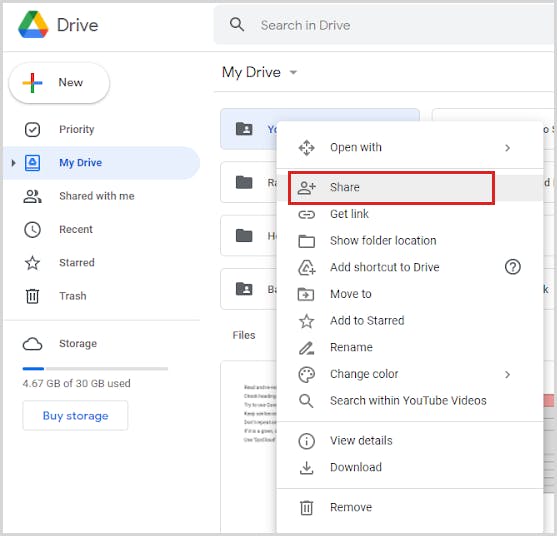
Step 3: Right-click on the file/folder and click on the option ‘Share’.
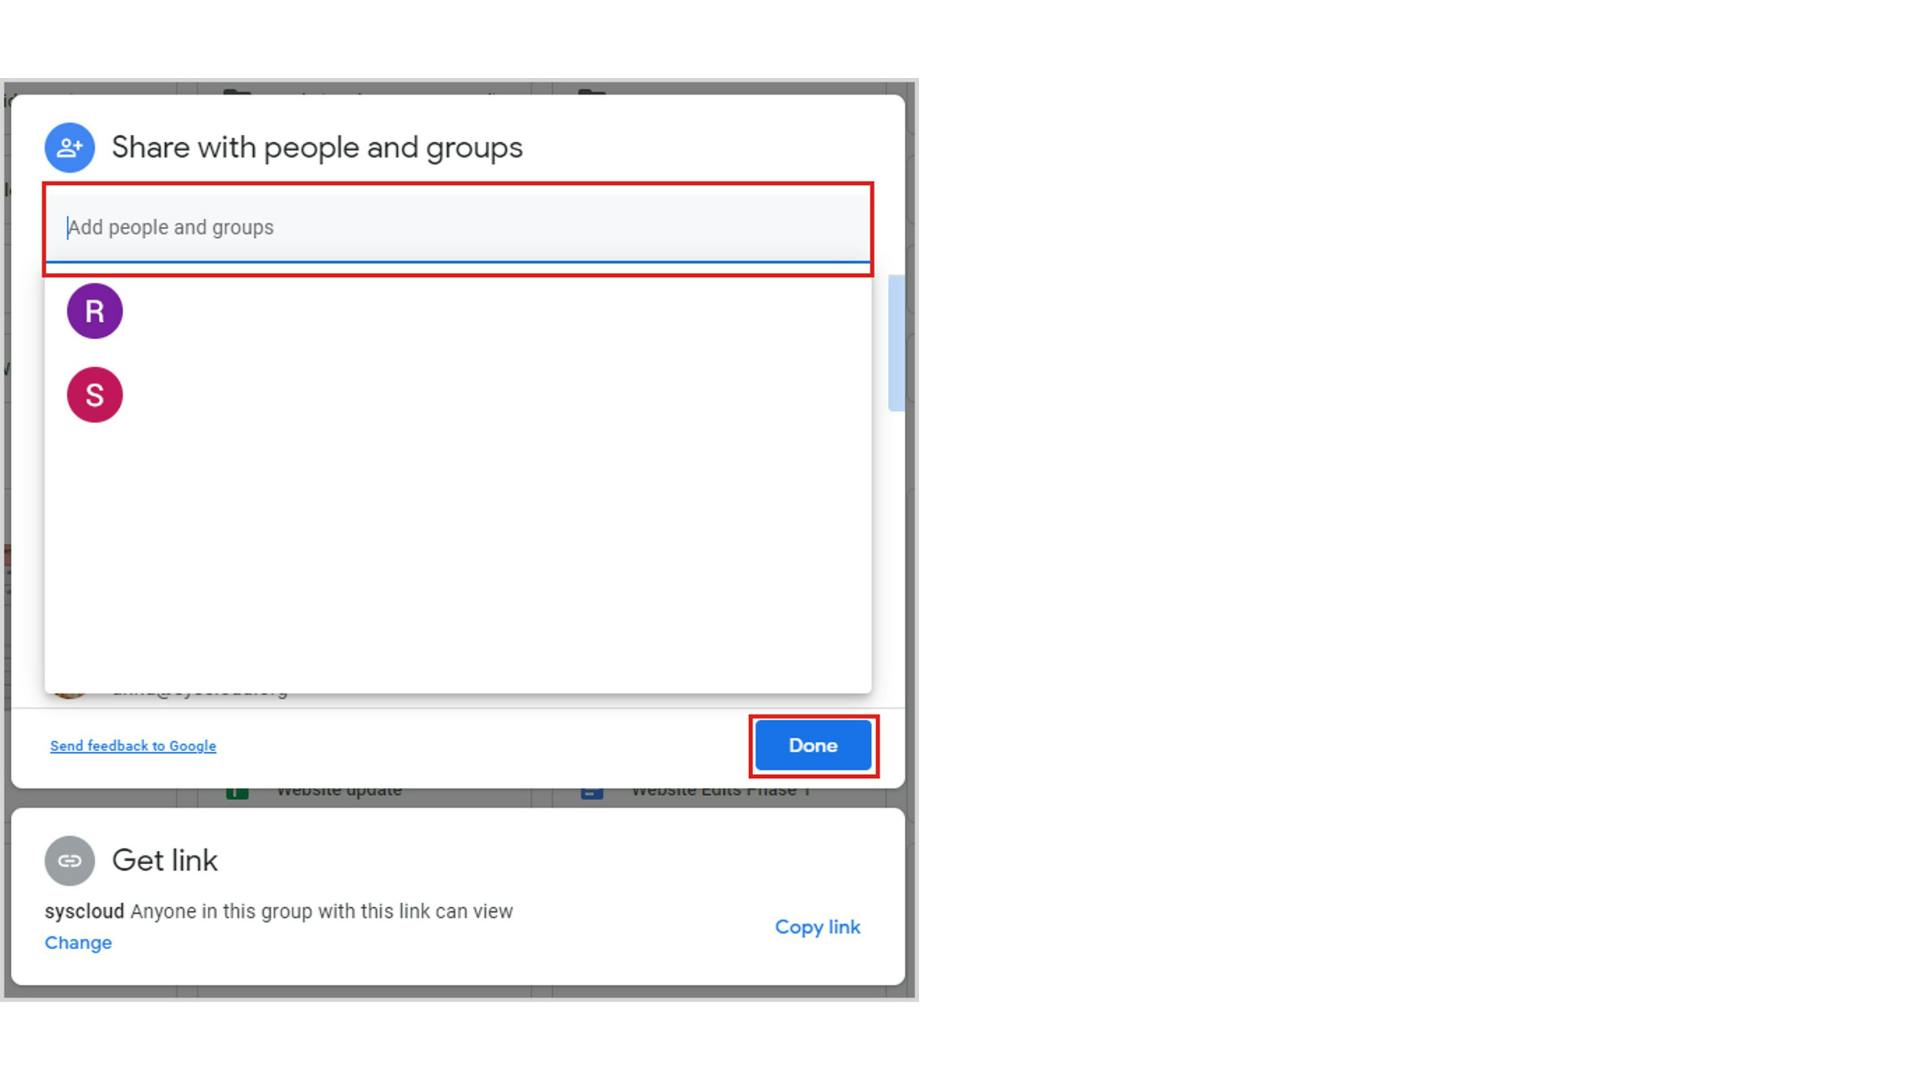
Step 4: Enter the email id of the user account to which you want to transfer the file and click “Done”.
Step 5: Once the new user is added, click on the drop-down button next to their user account, and select the “Make owner” option.
Step 6: You will find the file under “My Drive” in the second account.
Note: Once you transfer the ownership, you will no longer be the owner of the file.
Limitations of using “download and upload” and “sharing” methods to transfer Google Drive files to another account
- Both these methods require users to perform every single step individually. This can become tedious when you have to transfer multiple files.
- It can also get quite time-consuming to manually download and upload/share multiple files to transfer them to another account.
3. Using Google Takeout
How to transfer Google Drive to another account using Google Takeout
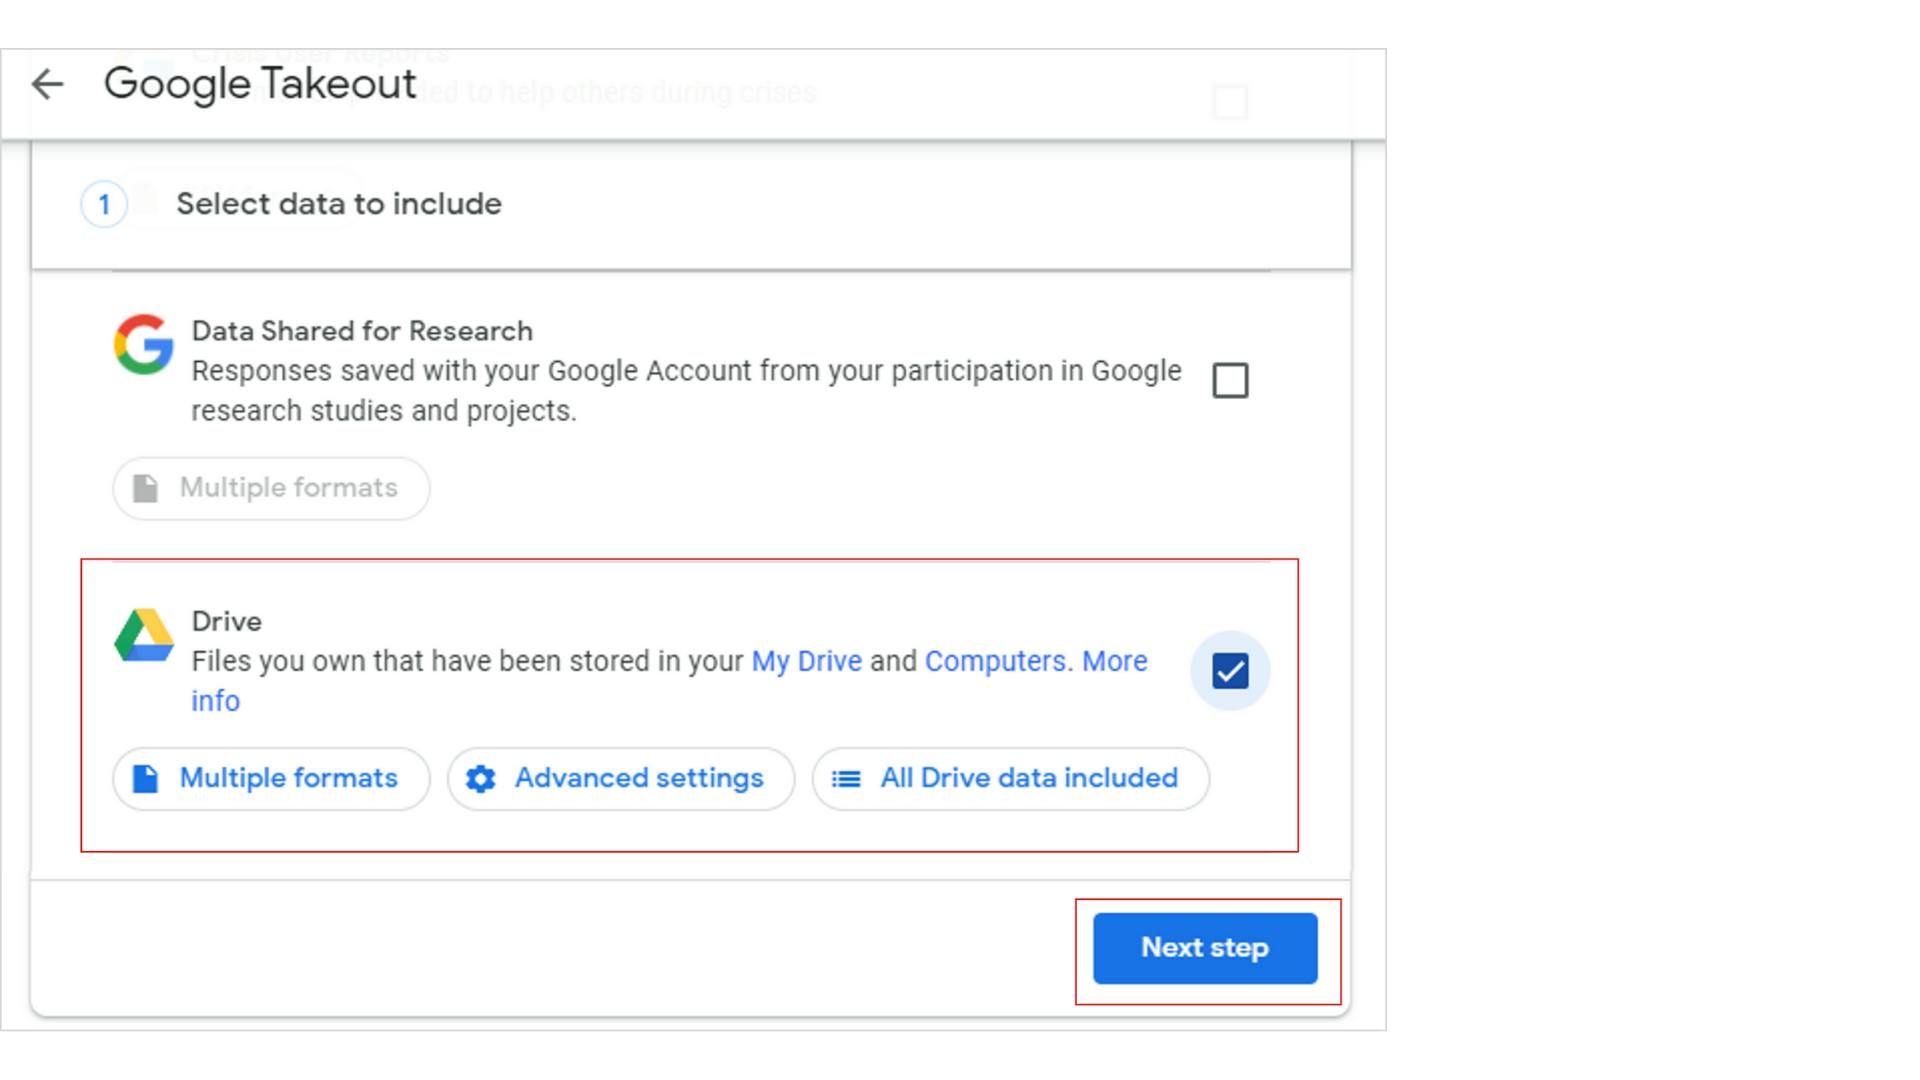
Step 1: Log in to Google Takeout.
Step 2: Under the “CREATE A NEW EXPORT” section, click “Deselect all” and then click on the box against the option “Drive” and click “Next step”.
Note:
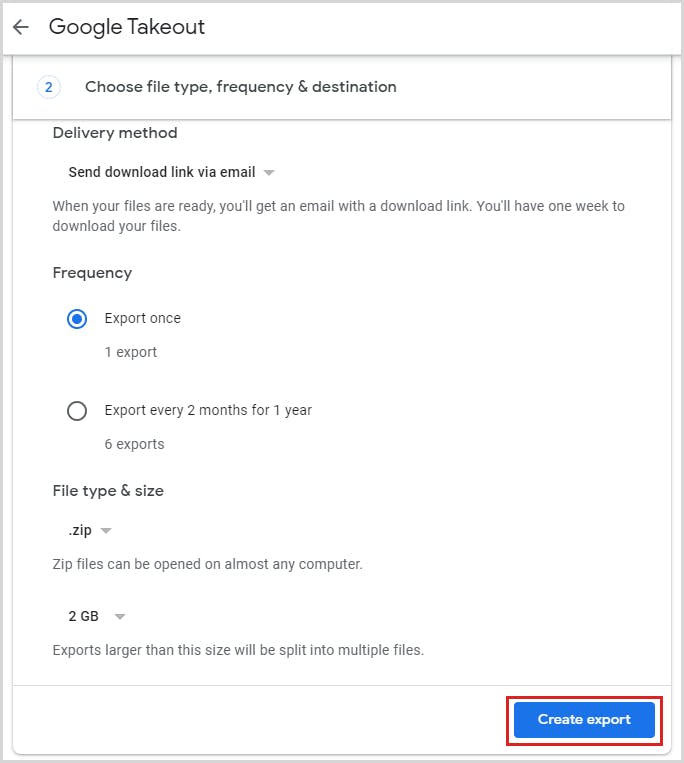
Step 3: Customize your archive format by selecting the Delivery Method, the Frequency of the export, and the File type & size and click on “Create Export”.
Step 4: Once the export is completed, you will receive an email notification. Click the “Download your files” button in the email. OR
Step 5: You can also check the status on the Manage your exports page. Click the “Download” button next to the exported file.
Step 6: Once you download the exported file, you can upload it to the user account to which you wanted to transfer these files.
To get more insights on how to use Google Takeout, click here.
4. From the Google admin console
How to transfer Google Drive to another account from the Google admin console
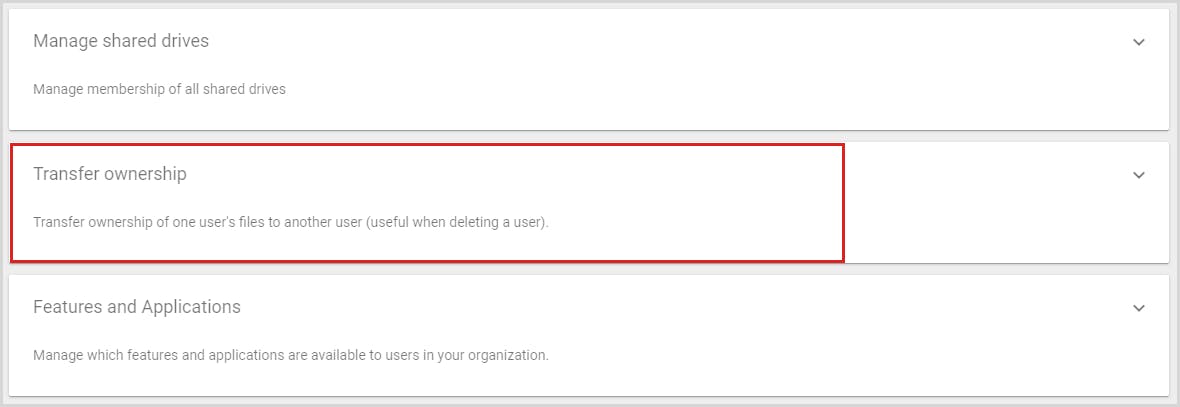
Step 1: Log in to Google Admin Console with your admin credentials.
Step 2: Go to ‘Apps> Google Workspace> Drive and Docs’.
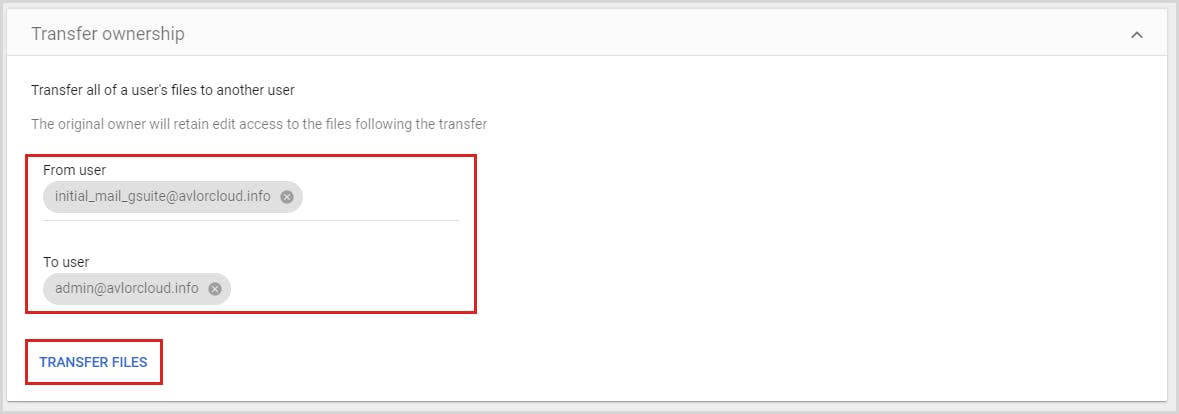
Step 3: Click “Transfer ownership”.
Step 4: Enter the current owner’s user name in the “From users” field and the new owner’s username in the “To user” field. Click “TRANSFER FILES”.
5. Using SysCloud
SysCloud offers automated backup for all Google Workspace applications. With SysCloud, you can transfer your entire Google Drive (along with Shared Drive) data, to another user account in the same domain.
How to transfer Google Drive to another account using SysCloud
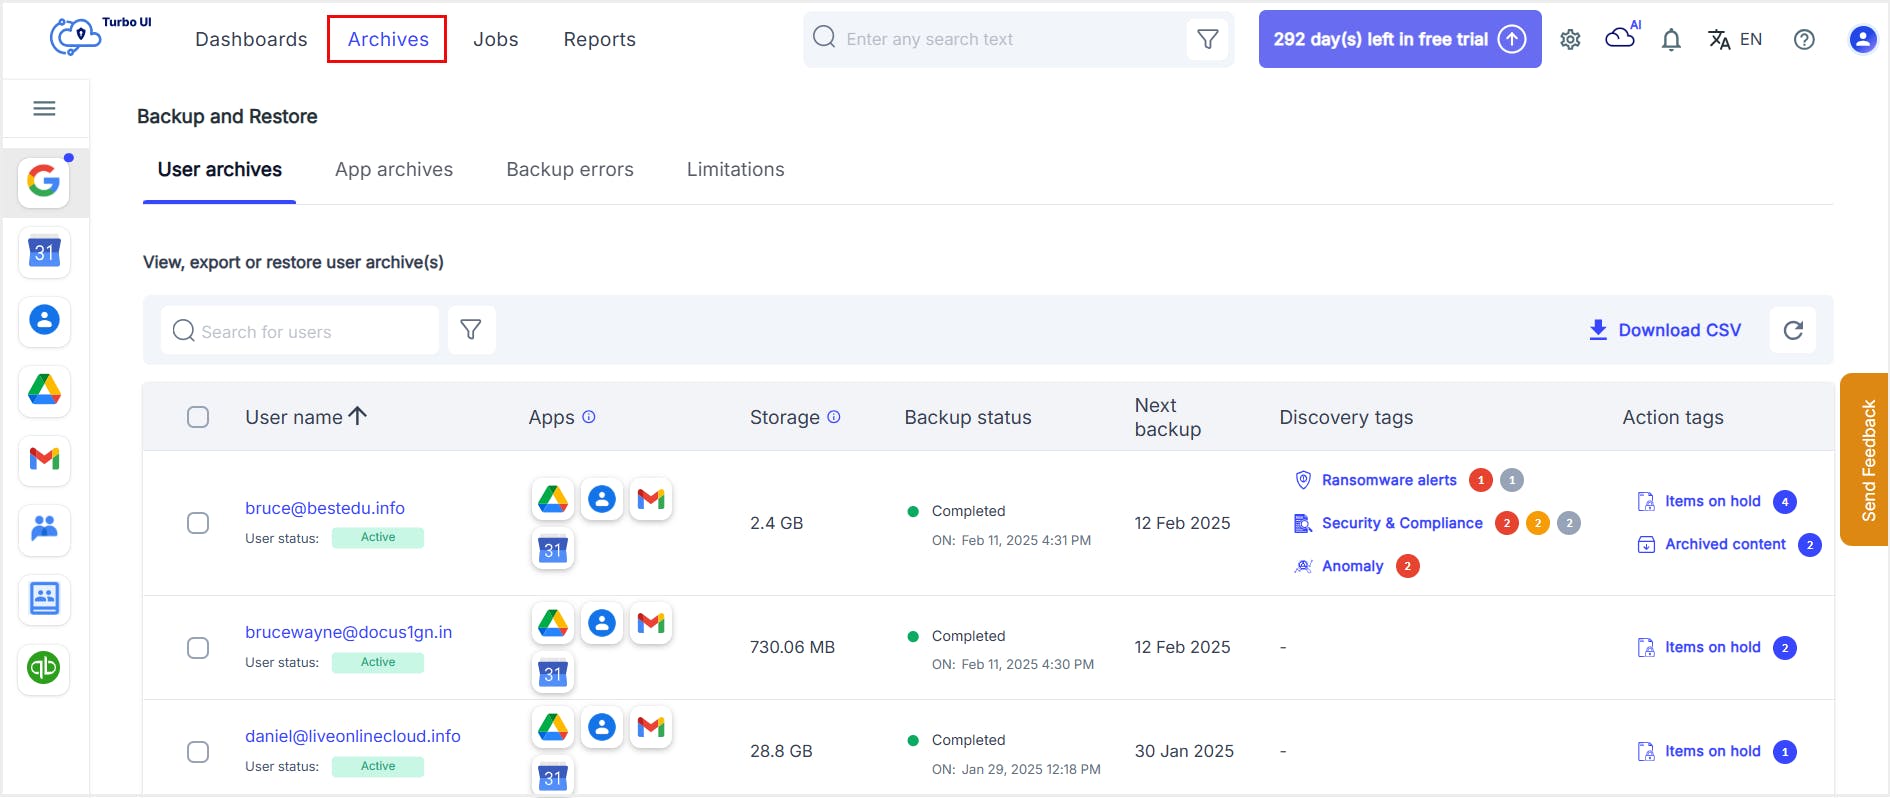
Step 1: Log in to SysCloud.
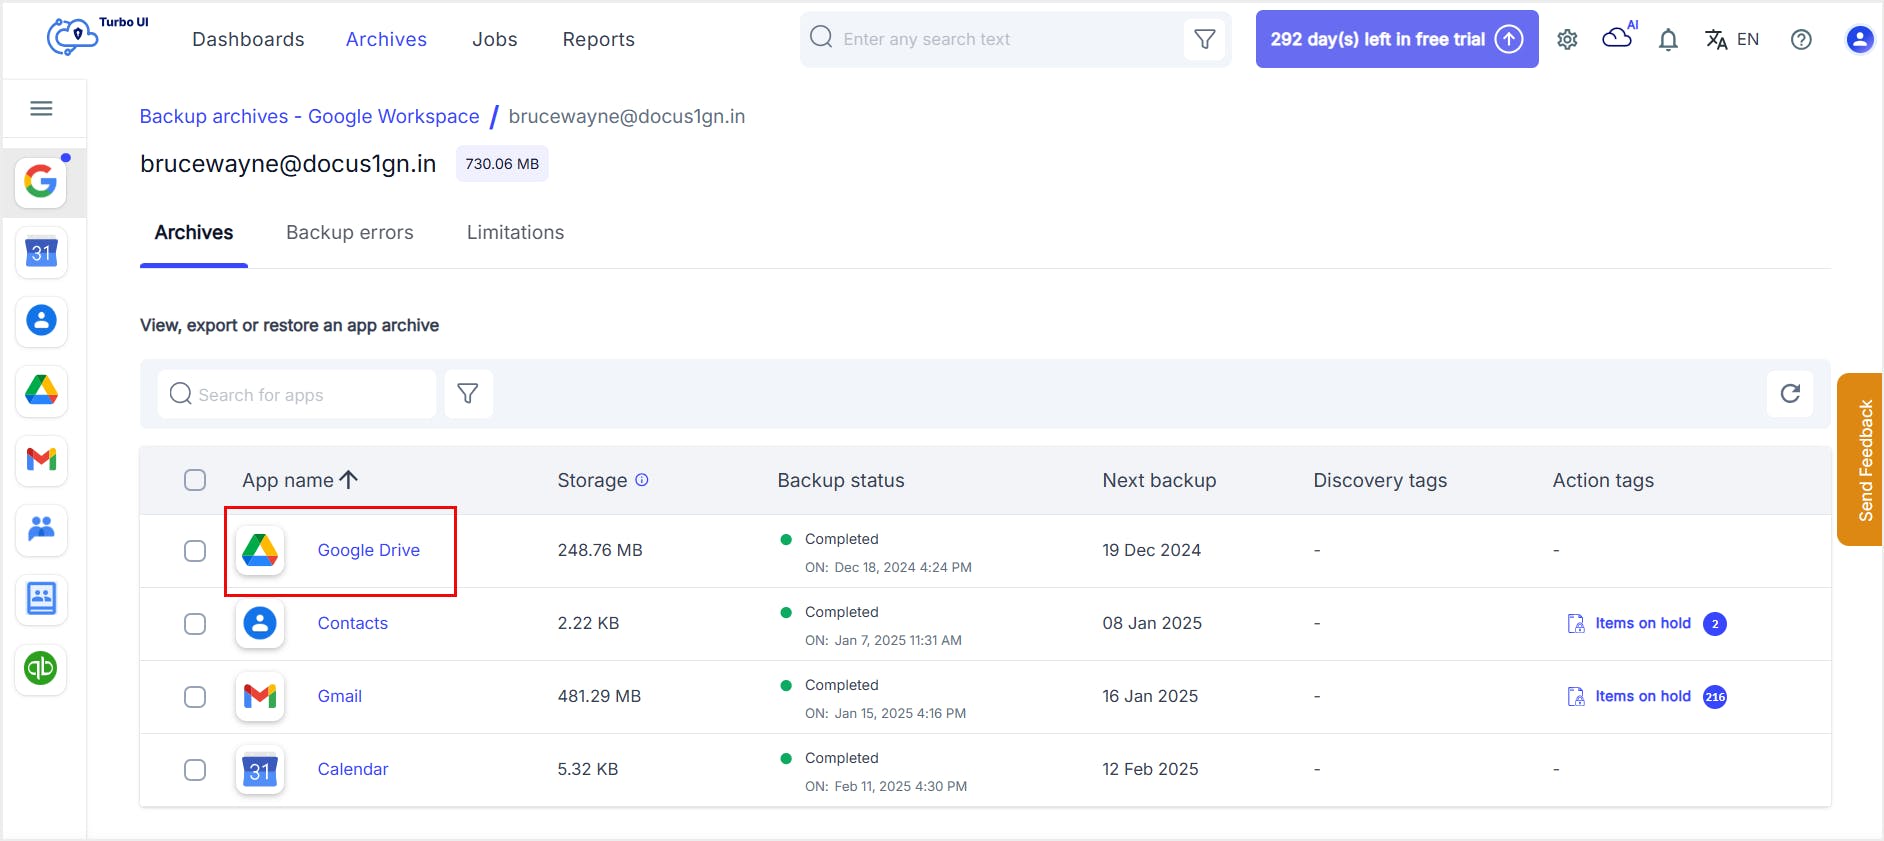
Step 2: Click on ‘Archives’ from the top navigation menu bar.
Step 3: Select the user account whose data you want to transfer to another account.
Step 4: Select the checkbox next to “Drive” on the app list.
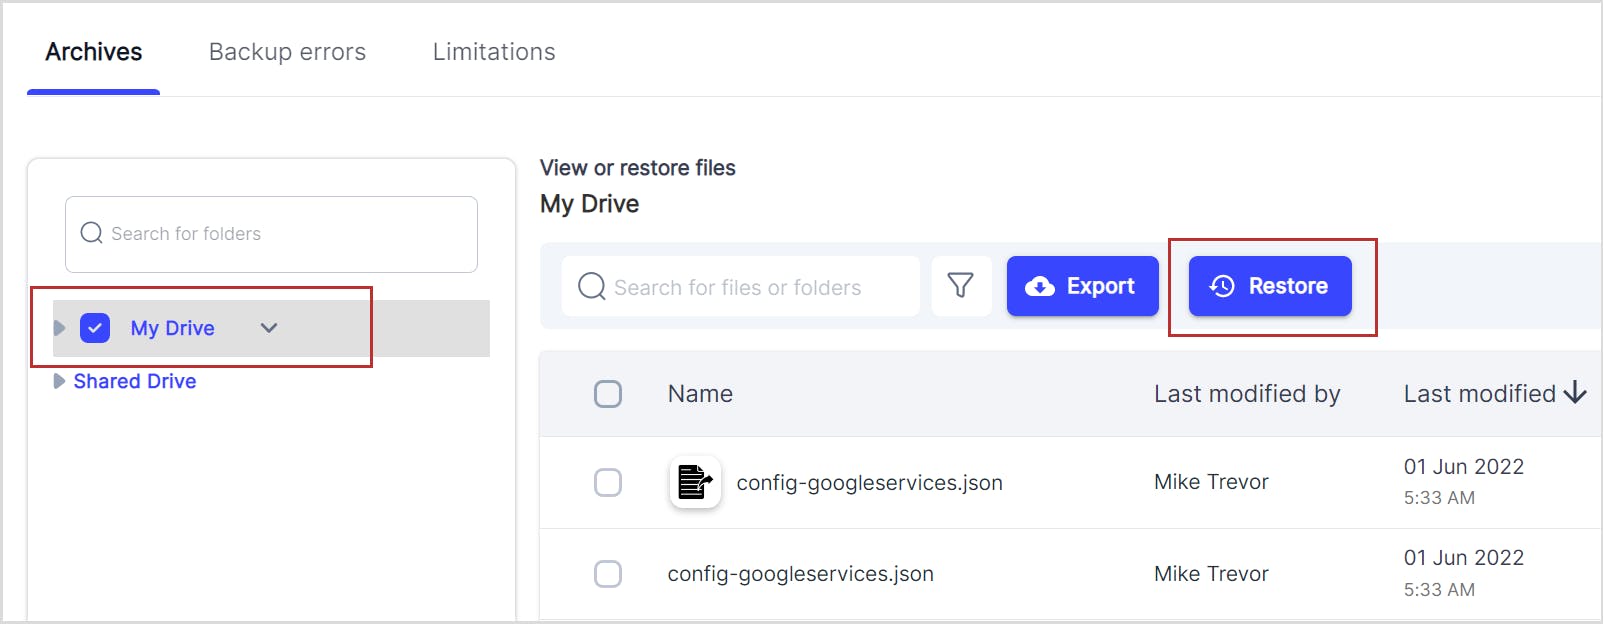
Step 5: On the left-hand side, click “My Drive”. If you want to transfer your Shared Drive files, click “Shared Drive” and select the Shared Drive folders that you want to transfer. After selecting the folder, click “Restore”.
Step 6: Enter the user email id to whose account you want to transfer the files. If you want to transfer the files with sharing permissions, select the checkbox next to “Restore all share permissions”. Click “Restore”.
Step 7: You can check the status of your file transfer on the “Restore Report” page. The file transfer process will take a few minutes to complete depending on the number of files that need to be transferred.
To know more about SysCloud, click here.