In this article
  • Introduction
  • Importing MBOX into Gmail
  • Prerequisites
  • How to import MBOX into Gmail
  • Is There a Better Way to Download and Restore Gmail?

How to Import MBOX into Gmail: A Step-By-Step Guide

17 Sept 2021
|
20 min read
|
Gopika Krishnan
twitterlinkedin
Blog Articles

Article at a glance

Importing MBOX files into Gmail can be challenging due to Gmail's lack of native support for the MBOX format.
  • To import MBOX files into Gmail, users must rely on third-party tools or methods such as converting MBOX to PST using Outlook, renaming MBOX to .eml files, or using Mozilla Thunderbird with the ImportExportTools add-on.

  • Each method requires specific steps and tools, such as enabling IMAP in Gmail, setting up the email client, and importing the files into Gmail via Outlook or Thunderbird.

Read more

Introduction

Google does not have a native backup feature within Gmail, but it lets the user download the emails in an MBOX format. An MBOX file structure holds emails in a plain text file format and is generally used to organize and store emails in a database. 
In this blog post, you will see step-by-step instructions to import MBOX into Gmail. 

Importing MBOX into Gmail

Exporting or downloading an email from Gmail is easy. There are two ways to do this:
1. By downloading individual emails one by one.
2. By downloading the entire mailbox via the Admin Console.
You will see the downloaded email(s) saved locally in the MBOX (MailBOX) format. But, strangely enough, Gmail does not support the MBOX format. 
Therefore, to import MBOX files into Gmail, you will have to necessarily rely on a third-party app. 
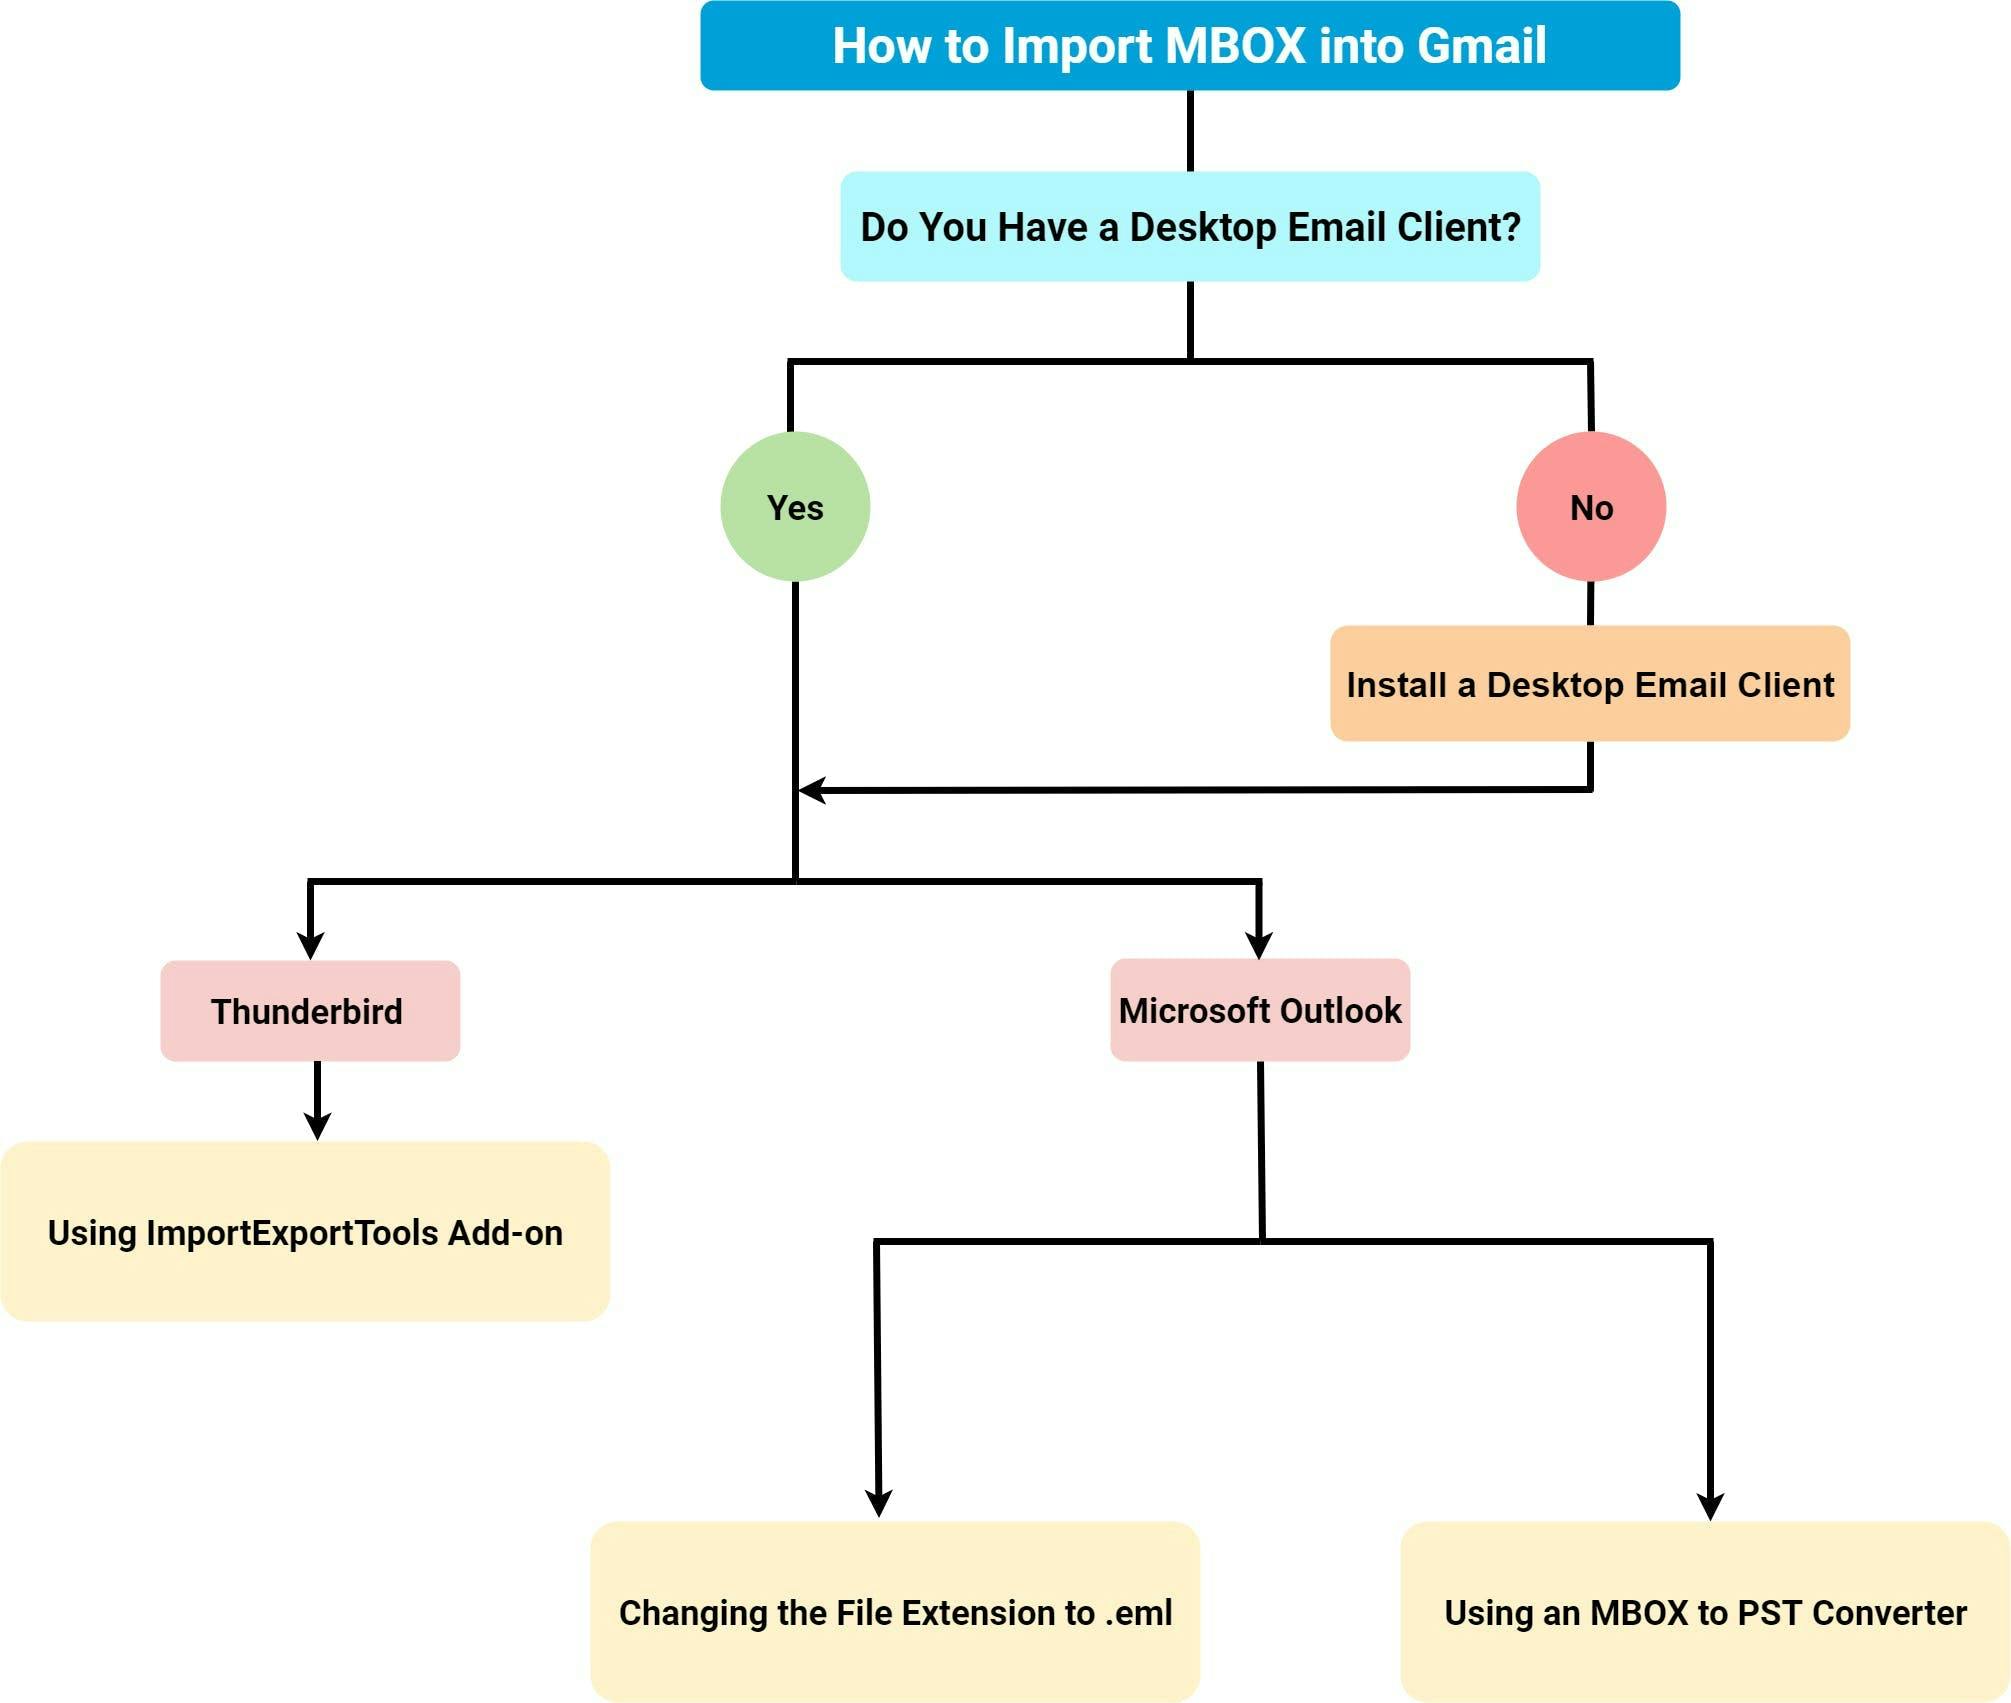
You have three options to import the MBOX files:

Option 1: Using MBOX to PST converter with Outlook Desktop Client

Option 2: Changing the file extension from .mbox to .eml before using Outlook Desktop Client

Option 3: Using Mozilla Thunderbird Desktop Client with ImportExportTools Add-on

Flow Chart

Prerequisites

1. Make sure you have either Microsoft Outlook or Mozilla Thunderbird Desktop Client installed on your PC and connected to the Gmail account where the MBOX file has to be imported.

2. Enable IMAP for the Gmail account you want to import the data back to.   
Here is how you can connect Outlook and Thunderbird to the Gmail account.

1. How to set up your email on Outlook desktop client
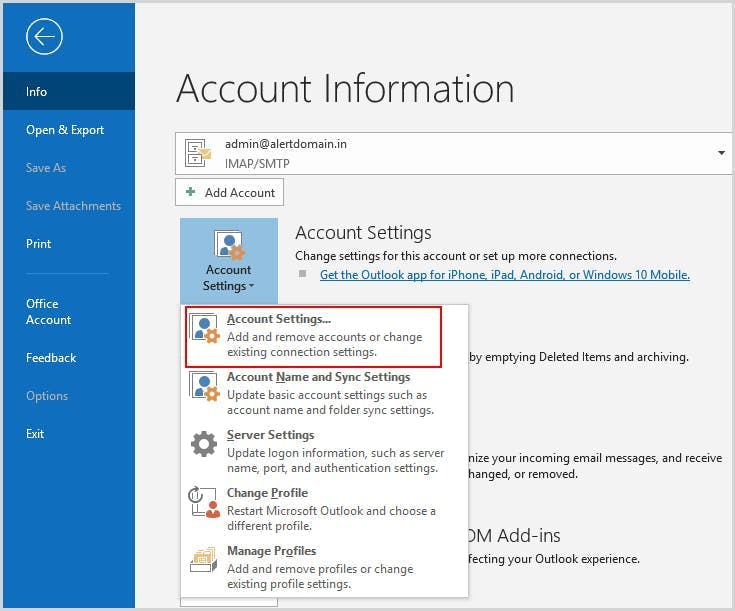
Step 1: Click “File”→ “Info” and then click the “Account Settings” icon and choose “Account Settings…”

Account Settings

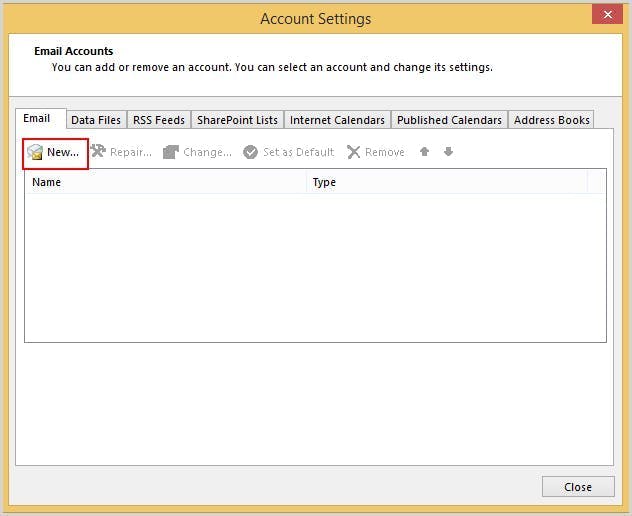
Step 2: Click “New…” in the dialog box. 

Dialog Box

Step 3: Type in your Mail ID and click “Connect.”

After signing in, you will be able to find different labels on the left-hand side of the Outlook window.

2. How to set up your email and install ImportExportTools on Thunderbird desktop client
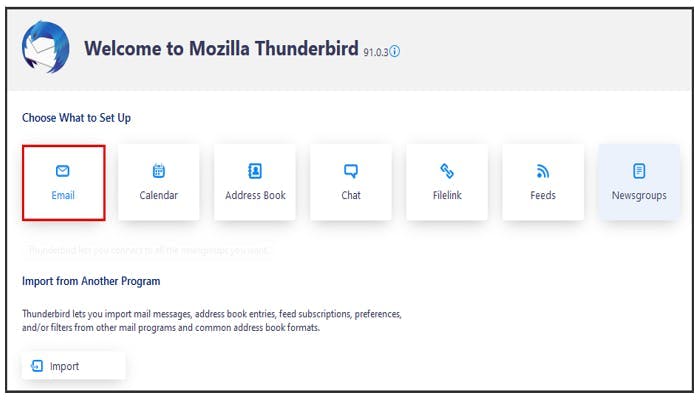
How to set up your email on Thunderbird desktop client

Step 1: Open Thunderbird Desktop Client and select “Email” under ‘Choose What to Set Up:’

Thunderbird

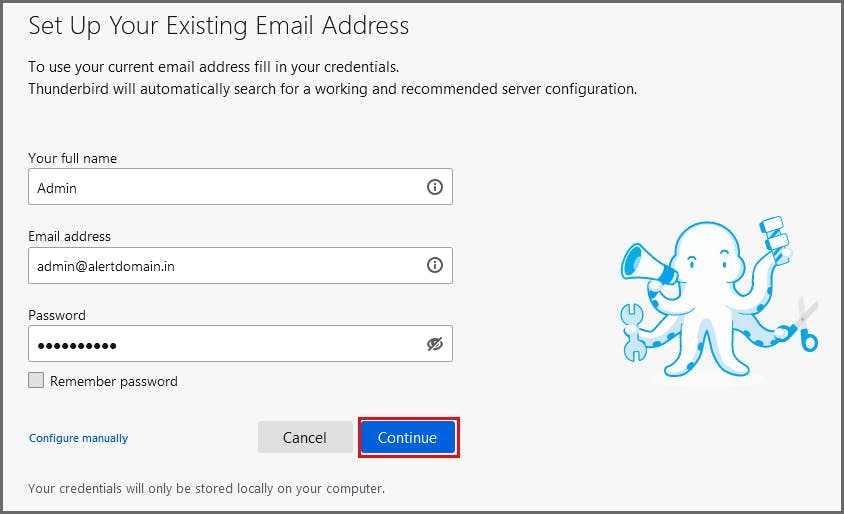
Step 2: In the dialog box that appears, enter your name, email address, and password and click on continue.

Thunderbird Login

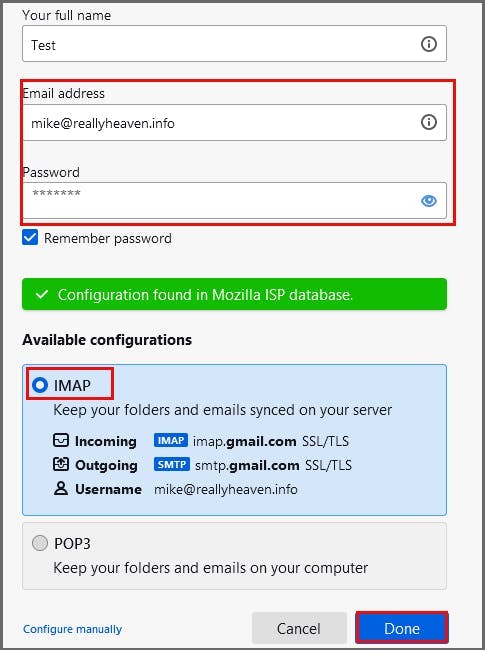
Step 3: Select the IMAP radio button, and click on the “Done” button.

IMAP

After you log in to the application, the different labels from your Gmail will be visible on the left-hand side of the window.

How to install ImportExportTools add-on

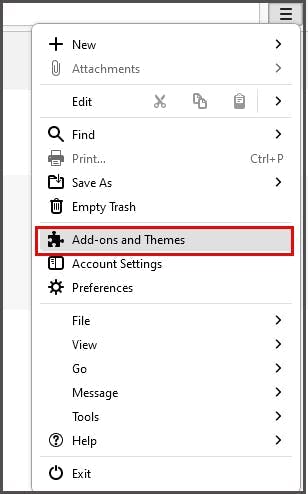
Step 1: On Thunderbird, click on the hamburger icon on the right-hand corner and click “Add-ons and Themes” from the drop-down menu.

ImportExport Tools

Step 2: In the next pop-up window, click on “Find more add-ons” at the bottom of the page.

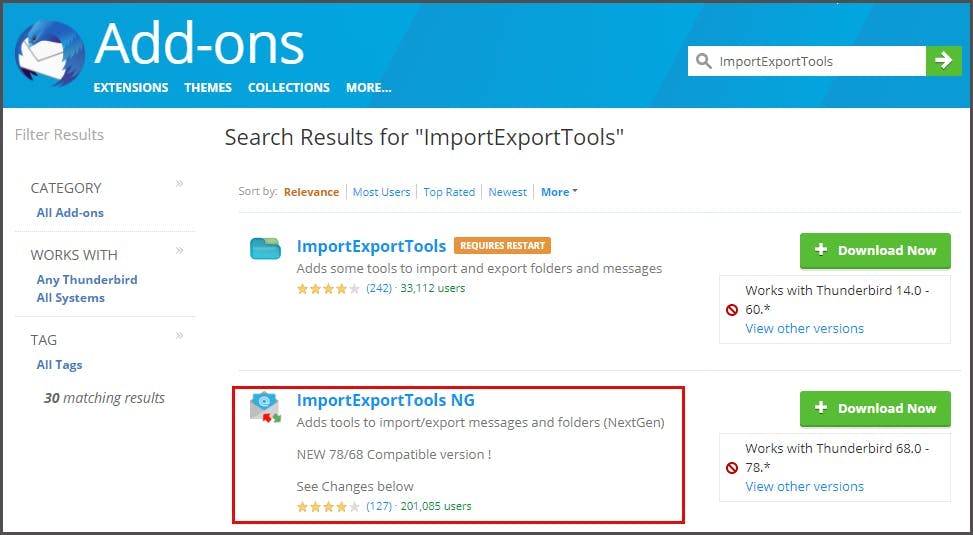
Step 3: Type in “ImportExportTools NG” in the search tab on the next screen. 

Add ons

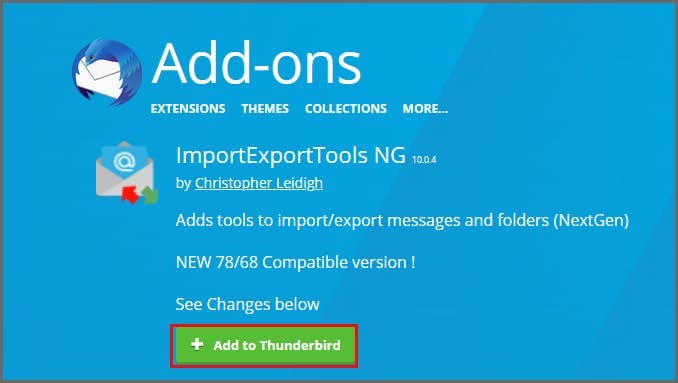
Step 4: Click “Add to Thunderbird.”

Add to Thunderbird.”

Step 5: Click “Install Now.”

Step 6: Restart the application to complete the installation. 

After the application is restarted, use these steps to import MBOX into Gmail using Thunderbird Desktop Client.

3. How to Turn on IMAP for the Gmail Account

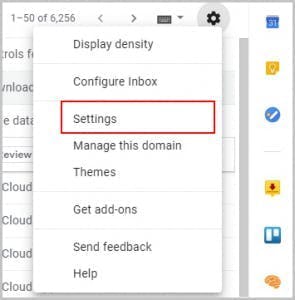
Step 1: Click the Settings icon that appears on the top right-hand corner of the Gmail mailbox.

Turn On IMAP

Step 2: Click “Settings.”

IMAP Settings

Step 3: Move to the “Forwarding and POP/IMAP” tab. Click “Enable IMAP.” Ignore this step if it has already been enabled.

Forwarding IMAP
Enable IMAP

Step 4: Click “Save Changes” to complete the action.

 Save Changes

How to import MBOX into Gmail

We have three options to import MBOX into Gmail:
Option 1: Using MBOX to PST converter with Outlook Desktop Client
Option 2: By changing the file extension from .mbox to .eml before using Outlook Desktop Client
Option 3: Using Mozilla Thunderbird Desktop Client with ImportExportTools Add-on

Option 1: How to import MBOXinto Gmail using MBOX to PST converter- Outlook desktop client
While the emails downloaded from Gmail are stored as a local MBOX file, Outlook Desktop Client supports only PST/Outlook Data File. So, to convert an MBOX file into a PST file, you need a separate tool. You can use a converter available online. Once you have successfully derived a PST file, you can import it into Outlook using these steps.

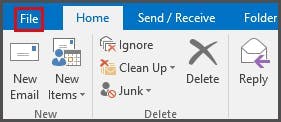
Step 1: Click “File” on the top left-hand corner of the Outlook window.

outlook

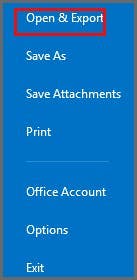
Step 2: Click “Open & Export.”

Open And Export

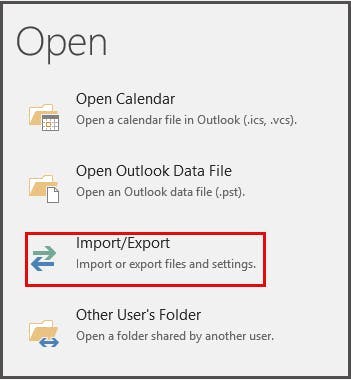
Step 3: Click “Import/Export.”

Outlook Import Export

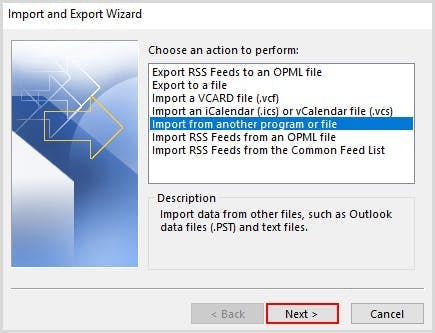
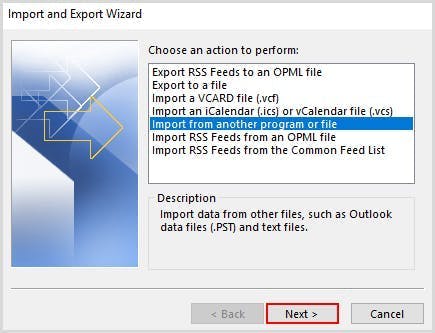
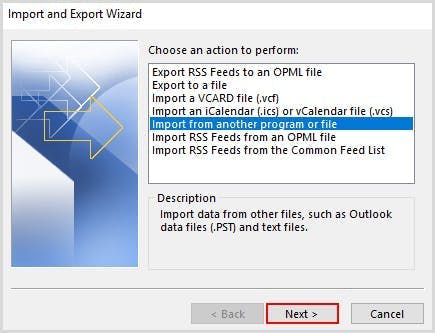
Step 4: In the dialog box, choose “Import from another program or file” and then click “Next.”

Outlook data file

Step 5: In the next dialog box, choose “Outlook Data File (.pst)” and click “Next.”

Outlook file

Step 6: After you browse and choose the file you want to import, click “Replace duplicates with items imported” and then click “Next.”

Replace Duplicate

Step 7: Choose the folder to import the file into, then click “Import items into the same folder in:” 

If you have multiple emails synced to Outlook Desktop Client, choose the email ID you want the messages back in. After this, click “Finish.” 

Import export wizard

All the messages downloaded into MBOX will now be visible under the folder that was chosen earlier.

Option 2: How to change the file extension and import Mbox into Gmail- Outlook desktop client

An easier way would be to manually change the file extension to .eml.
The MBOX file, by default, is downloaded as a zip file, and you need to extract the files before any changes can be made.

How to extract files from a ZIP folder

Step 1: Click the “Extract All” icon on the toolbar at the top of the window.

Extract

You will be able to browse and choose the location to which the file needs to be saved. The extracted file will look like this.

Extracted

You will now be able to manually change the file extension from .mbox to .eml.

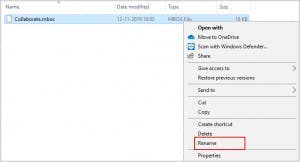
Step 2: Select the file and right-click on it. On the menu bar that appears, click “Rename.”

Rename

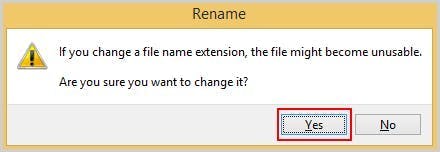
Step 3: Click “Yes” at the bottom of the dialog box

Rename

After changing the extension manually, the file will look like this.

Change extension

Now use the following steps to import the EML file into Outlook.

How to import an EML file into Outlook desktop client

Step 1: Drag the EML file and drop it under the label of your choice.

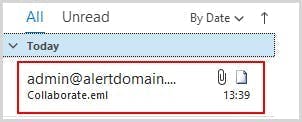
The EML file will be visible under the messages section as seen below.

Import EML

Step 2: Double click on the message to open it.

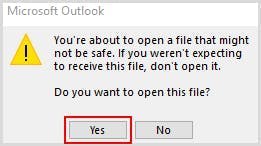
Step 3: Click “Yes.”

YES

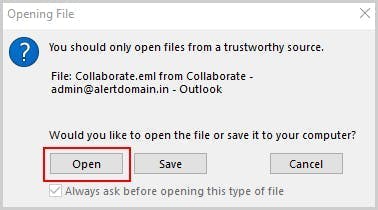
Step 4: Click “Open.”

The opened file will display the message that was stored in the downloaded MBOX.

Note: This option is more suitable for when you have a single message stored in the MBOX file. If there are multiple messages in the file, all of them will be displayed under a single message after being imported into Outlook.

Option 3: How to import MBOX into Gmail- Thunderbird desktop Client
Mozilla Thunderbird is a popular open-source Outlook alternative. Since Thunderbird supports MBOX files, you can directly import the data onto Thunderbird. Though an add-on tool is required to be installed, this is the simplest of all the options.

How to import your Gmail MBOX exports into a Gmail account

Step 1: Link your Gmail account to Thunderbird Desktop Client and install ImportExportTools add-on using these steps.

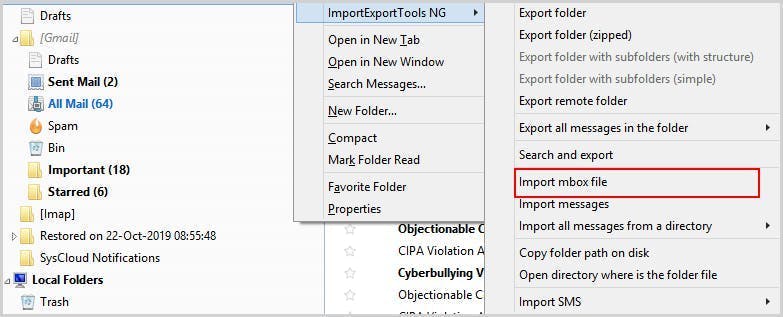
Step 2: Right-click on the left-hand pane and select “ImportExportTools.”

Thunderbird Import Export

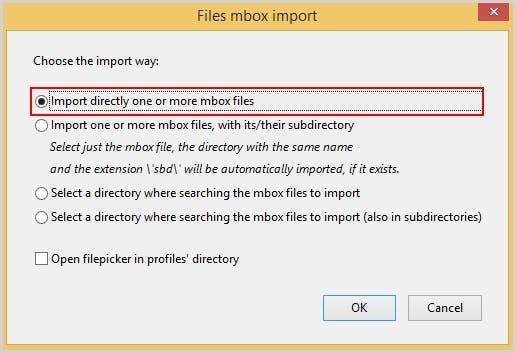
Step 3: In the dialog box, choose “Import directly one or more MBOX files” and browse through your PC to choose the MBOX file.

Import

Step 4: After choosing the file, click “Open.” The MBOX file will be imported into Thunderbird with a label that’s the same as the file name.

Step 5: Drag and drop the imported data into the label’s section under your Gmail Account.

Note: If you are unable to find the restored data on Thunderbird, try restarting the application.

Is there a better way to download and restore Gmail?

Using MBOX to PST converters, changing MBOX file extensions to .eml, or using Thunderbird add-on work fine when you have to restore Gmail just for a single user or a limited number of users.

However, if you are looking to import MBOX to Gmail in bulk, you may have to rely on paid tools or open-source tools available on GitHub./a>

1. Cigati MBOX Converter/a>

2. Sysinfo MBOX Exporter

3. BitRecover MBOX to Gmail Wizard

4. KDE Tools MBOX to Gmail Converter 

5. Advik MBOX to Gmail Import

6. MacUncle MBOX to Gmail Wizard

7. MS Outlook MBOX Importer Tool

Having a Gmail backup in place using third-party apps like SysCloud can help you avoid the hassles of dealing with MBOX format conversion. 
SysCloud backs up your emails on an incremental basis, allowing you to download and restore them quickly in the event of data loss. If you choose to download emails from SysCloud backup archives, you have the option to directly download them in the PST format and restore your data in just a few simple steps.

In this article
  • Introduction
  • Importing MBOX into Gmail
  • Prerequisites
  • How to import MBOX into Gmail
  • Is There a Better Way to Download and Restore Gmail?
twitterlinkedin